If you’ve ever found that your neighbors are using your Wi-Fi for free or you’re concerned that someone has hacked your network, it might be time to secure it.
Thanks to smart devices, otherwise known as the internet of things (IoT), home networks are more vulnerable than ever. In fact, 2025 saw an average of 820 thousand malicious IoT hacking attempts.
The problem is that new routers don’t come secure right out of the box. So you’ll have to use these 19 methods to secure your home network.
Securing Your Router’s Wireless Network
Start by taking a few steps to secure your network from unwanted access through these methods:
- Change your router’s password
- Update your router’s name
- Select a new administrative login
- Turn off UPnP
- Turn on strong encryption
- Change your router’s IP address
- Create a guest network
- Update your router’s firmware
- Turn off WPS
- Disable remote management
- Isolate your smart devices
- Keep your router in a secure location
- Monitor your network for suspicious activity
- Turn off your network (when you aren’t using it)
- Use MAC Address filtering
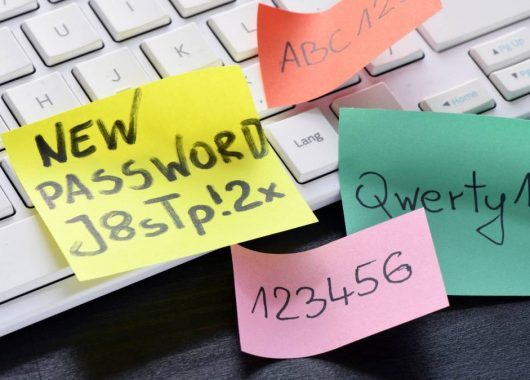
1. Change Your Router’s Network Security Key (Password)
Your router’s default network security key, or wireless network password, is easy to guess if someone knows your router’s model. Neighbors could use this information to use your network as if it were theirs.
You can change your router’s security key with these steps:
- Retrieve your router’s default gateway (Router IP address) from your network settings.
- Type the default gateway into your browser’s address bar.
- Log in using your router’s admin name and password (found in the owner’s manual)
- Open your router’s Wi-Fi settings.
- Select “Change” next to your router’s password and type in a new one.
Consider a password manager to create and store your router’s password and administrative credentials. This will save you from needing to remember a complex password, which is necessary to keep your router secure. You can often autofill the password on the router login page using tools like Panda Dome Password Manager.
| Heads up: Check whether your internet service provider (ISP) has an app to help you manage your network, making it much easier to change your settings. Well-known ISPs with network management apps include Xfinity, AT&T, Spectrum, Cox, and Gfiber. |
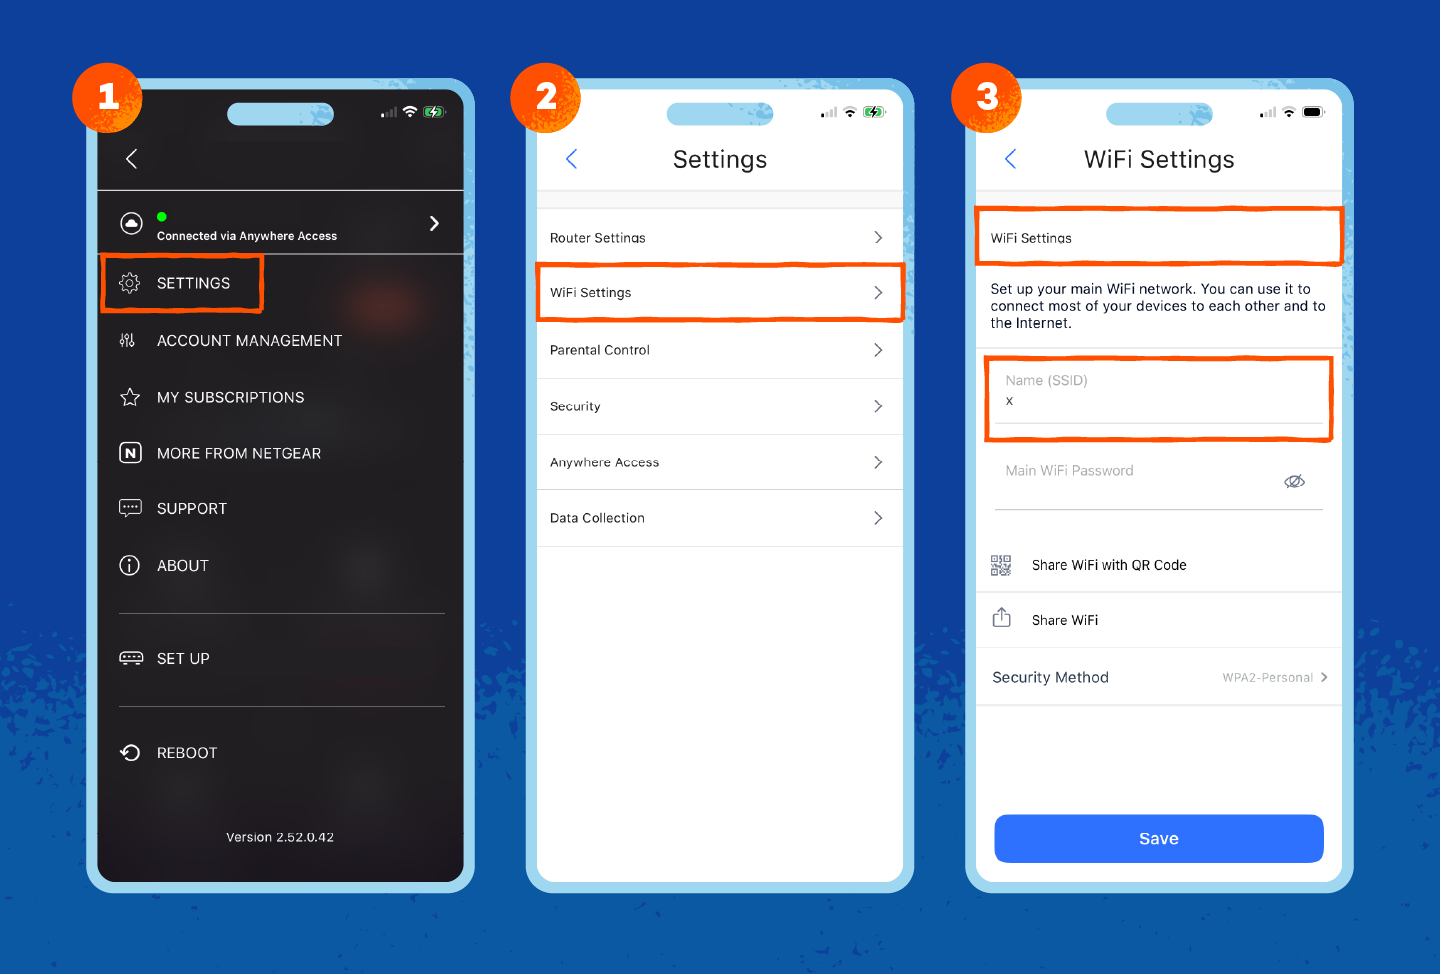
2. Change Your Network Name (SSID)
A Service Set Identifier (SSID) is another name for your Wi-Fi network. Changing it makes you more secure by hiding the router’s default name, which can reveal its model information. The model name makes it easier for cybercriminals to take advantage of known vulnerabilities to gain access.
Here’s how to change your router’s SSID:
- Log in to your router’s admin page through its default username and password.
- Access your Wi-Fi network’s settings.
- Select Change next to your router’s SSID (or name).
- Enter a new name for your Wi-Fi network.
Select a new SSID that won’t give away any personal information, as Wi-Fi networks broadcast to everyone in the area. For instance, consider “Router Network” with a random string of numbers to avoid conflicts with nearby routers with similar names.
3. Change Your Router’s Administrative Login
Your router’s administrative credentials are the username and password you use to log into the admin console. You don’t use it to access the internet, but you do use it to change your internet settings.
Here’s how to change your router’s administrative username and password:
- Access your router’s administrative panel through its default username and password.
- Look for your Administrative, System Tools or Security menu.
- Enter a new, secure password and click Save or Apply.
Follow the same rules you use normally to create secure, easy-to-remember passwords. Consider the administrative password no different from any other account password, since you’re creating an account to manage your router.
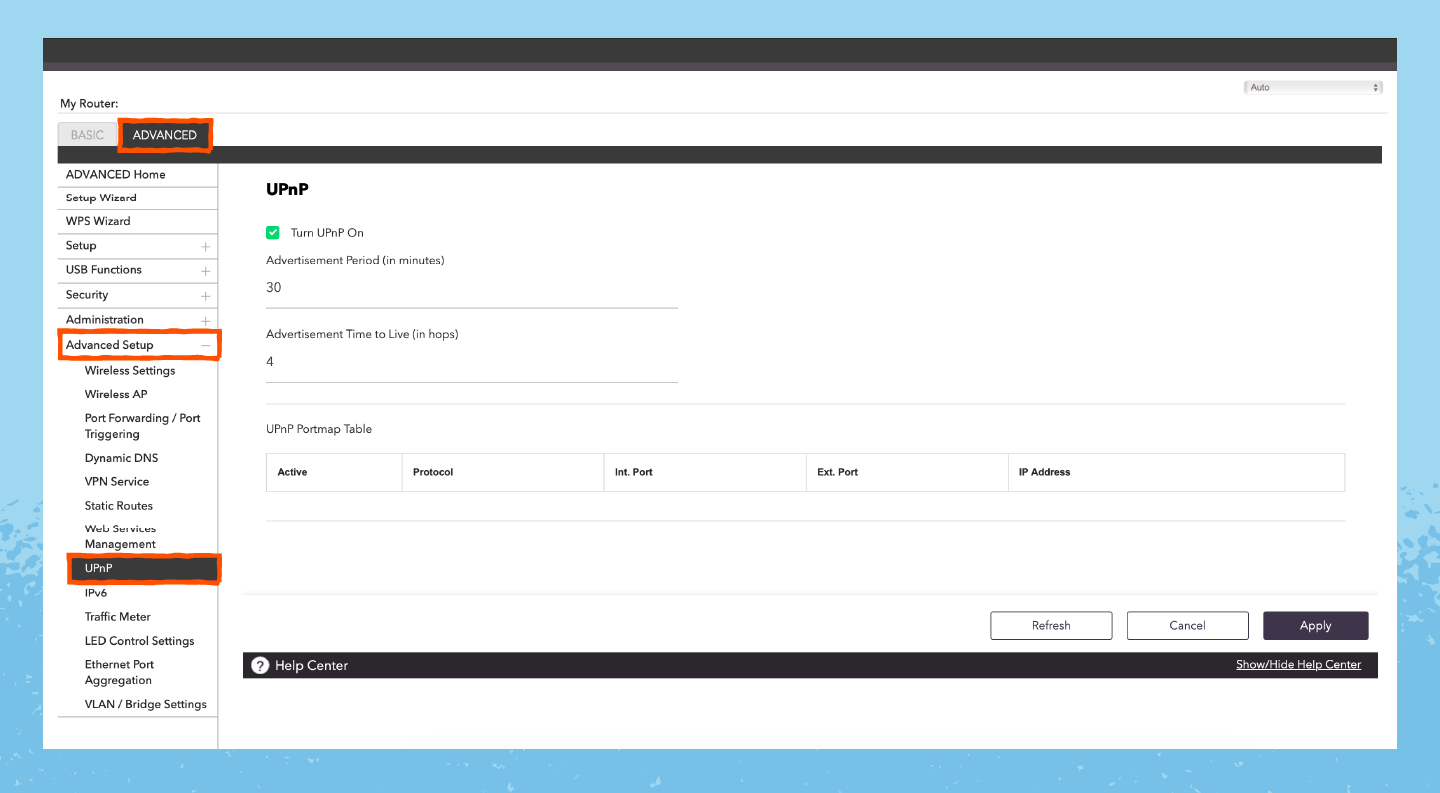
3. Turn Off UPnP
Universal Plug and Play (UPnP) makes it easier to connect to video game servers by automatically opening ports. These ports are like the gateways to your computer, and leaving them open can invite cybercriminals to invade your personal network.
Here’s how to disable UPnP on your router:
- Access your router’s admin page.
- Navigate the menus to find Advanced Network Settings or NAT Forwarding.
- Uncheck the box next to UPnP, then select Save or Apply.
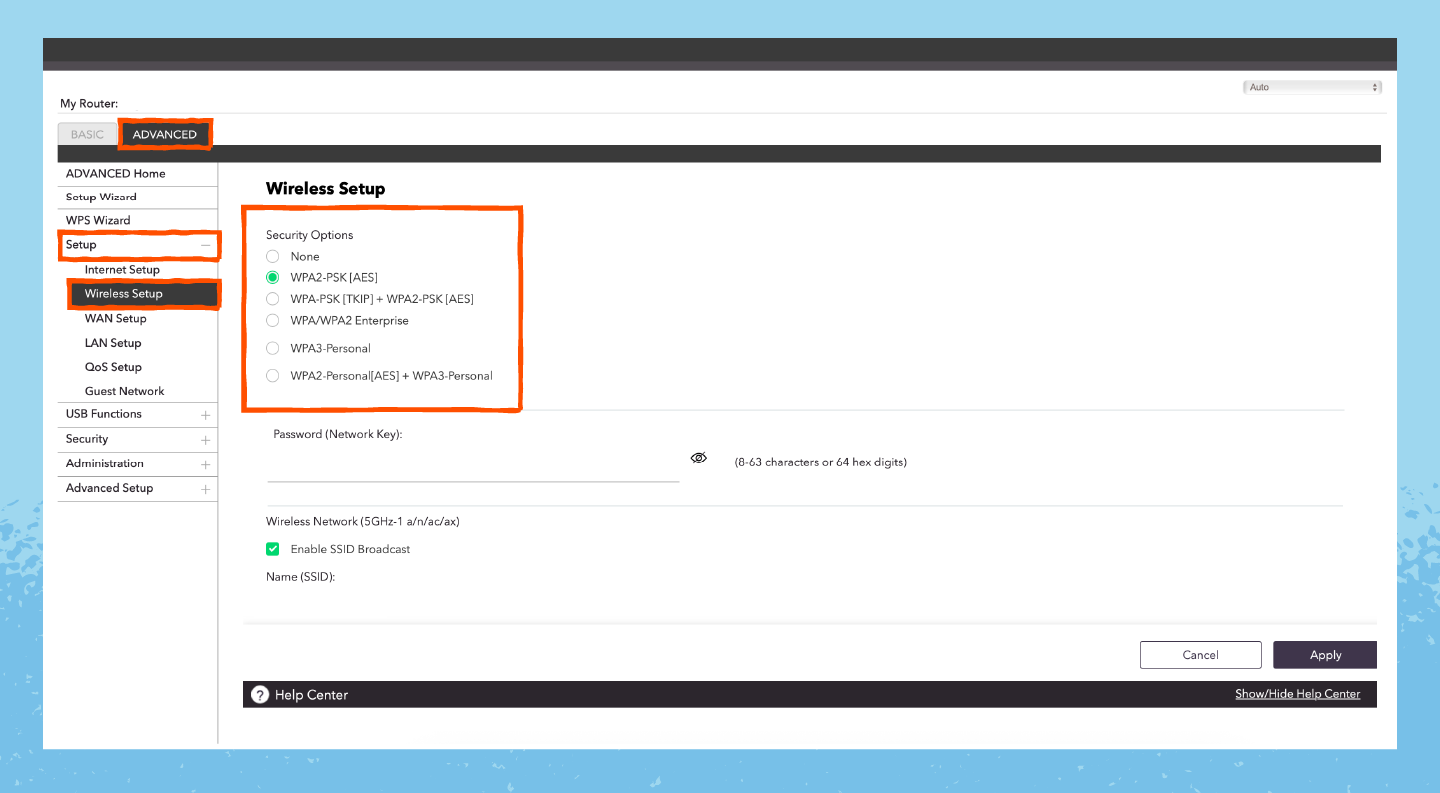
4. Turn On Strong Encryption
Encryption refers to the strength of your wireless network’s security, which protects your network from cybercriminals trying to break in. The strongest security across modern wireless routers is WPA3 (Wi-Fi Protected Access), but some devices aren’t compatible with it.
You can also rely on WPA2, an older version of WPA3 that works with more devices and is secure for everyday users. But avoid the original WPA and WEP (Wired Equivalent Privacy), as these are older protocols that cybercriminals can more easily crack.
Here’s how to ensure your wireless network uses strong encryption:
- From your router’s admin page, click or tap your regular Home Wi-Fi Security Settings.
- Select either WPA3 or WPA2.
- Choose Save or Apply to commit changes.
5. Change Your Router’s IP Address
Your router’s IP address, also known as its default gateway, is the address you use to access its admin page. Knowing this, along with your admin login, helps cybercriminals take control of your network.
Here’s how to change your router’s default gateway (IP address):
- Access your router’s admin page.
- Navigate to Settings, Network or Local Network.
- Look for the IP Address and change the last two numbers to your desired gateway.
- Select Save or Apply.
Most routers use 192.168.1.1 or 0.1 as their default gateway, but this can vary by model. If you can’t find it in your network settings, you can find the default gateway in your router owner’s manual.
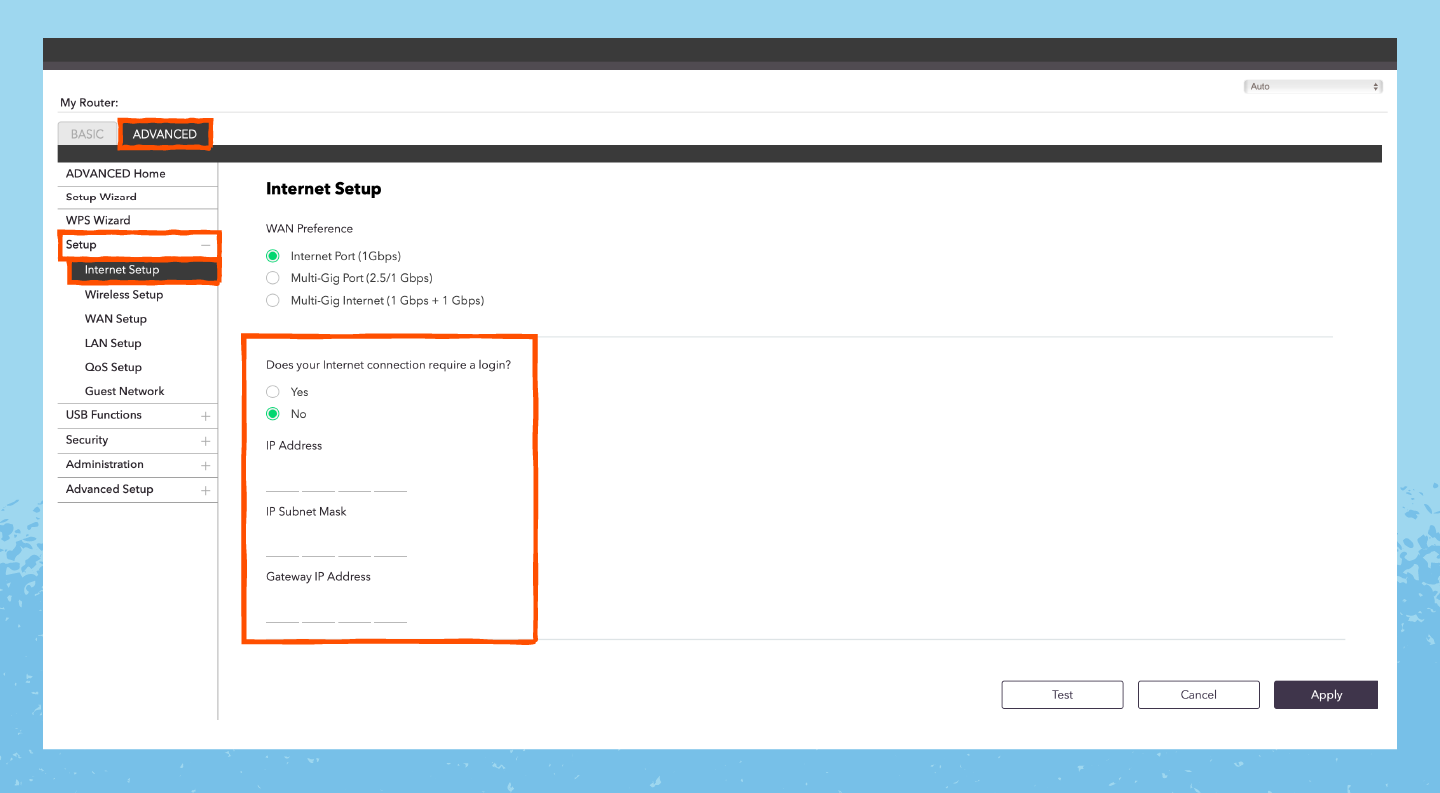
6. Create a Guest Network
A guest network is a separate Wi-Fi network from your main one that you can share with visitors and friends. Limiting who you share your main network with protects your personal devices from malware that may be present on guest devices.
Here’s how to set up a guest network:
- From your admin panel, look for Guest Network/Access.
- Toggle on Client Isolation (or Isolate from Main Network)
- Customize the name and password and toggle on the network.
- Click Save or Apply.
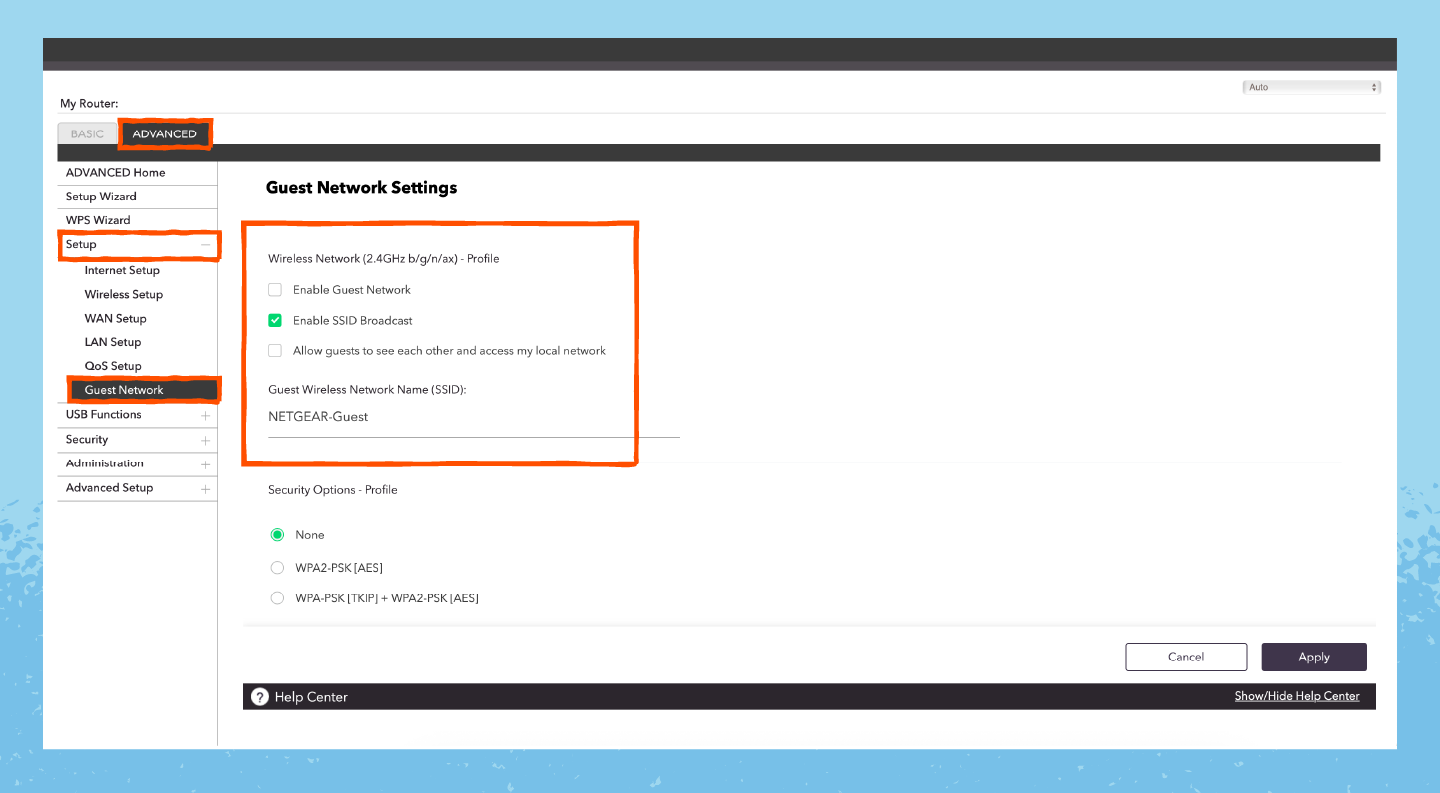
Step two, isolating your devices, is arguably the most important because it segments guest devices into their own network. Some routers do this automatically, so check with your ISP to see how your router handles guest connections.
7. Update Your Router’s Firmware
Firmware runs your router like software runs your computer, supporting connections and protecting your network. Regular updates can patch known vulnerabilities in older firmware versions, protecting you from cybercriminals who may try to break into your network.
Most routers update in the background, so you don’t need to do it manually. Check your router’s admin page to see if automatic updates are enabled.
If necessary, here’s how to manually update your router’s firmware:
- Download your router’s latest firmware from the manufacturer’s website.
- Open your router’s admin panel.
- Look for Router Update or a similar menu.
- Select Browse or Upload from the menu and upload your firmware.
- Wait for the update to finish.
8. Turn Off WPS
Wi-Fi Protected Setup (WPS) is a button on the front of your router that lets one device connect without a password. While handy, it allows guests to access your private network without a password, potentially spreading malware to devices on it.
Here’s how to turn off your router’s WPS:
- From your router’s admin page, look for a Wireless, Wi-Fi or Advanced Settings menu.
- Look for WPS or Wi-Fi Protect Setup.
- Toggle off the button next to this setting and select Save or Apply.
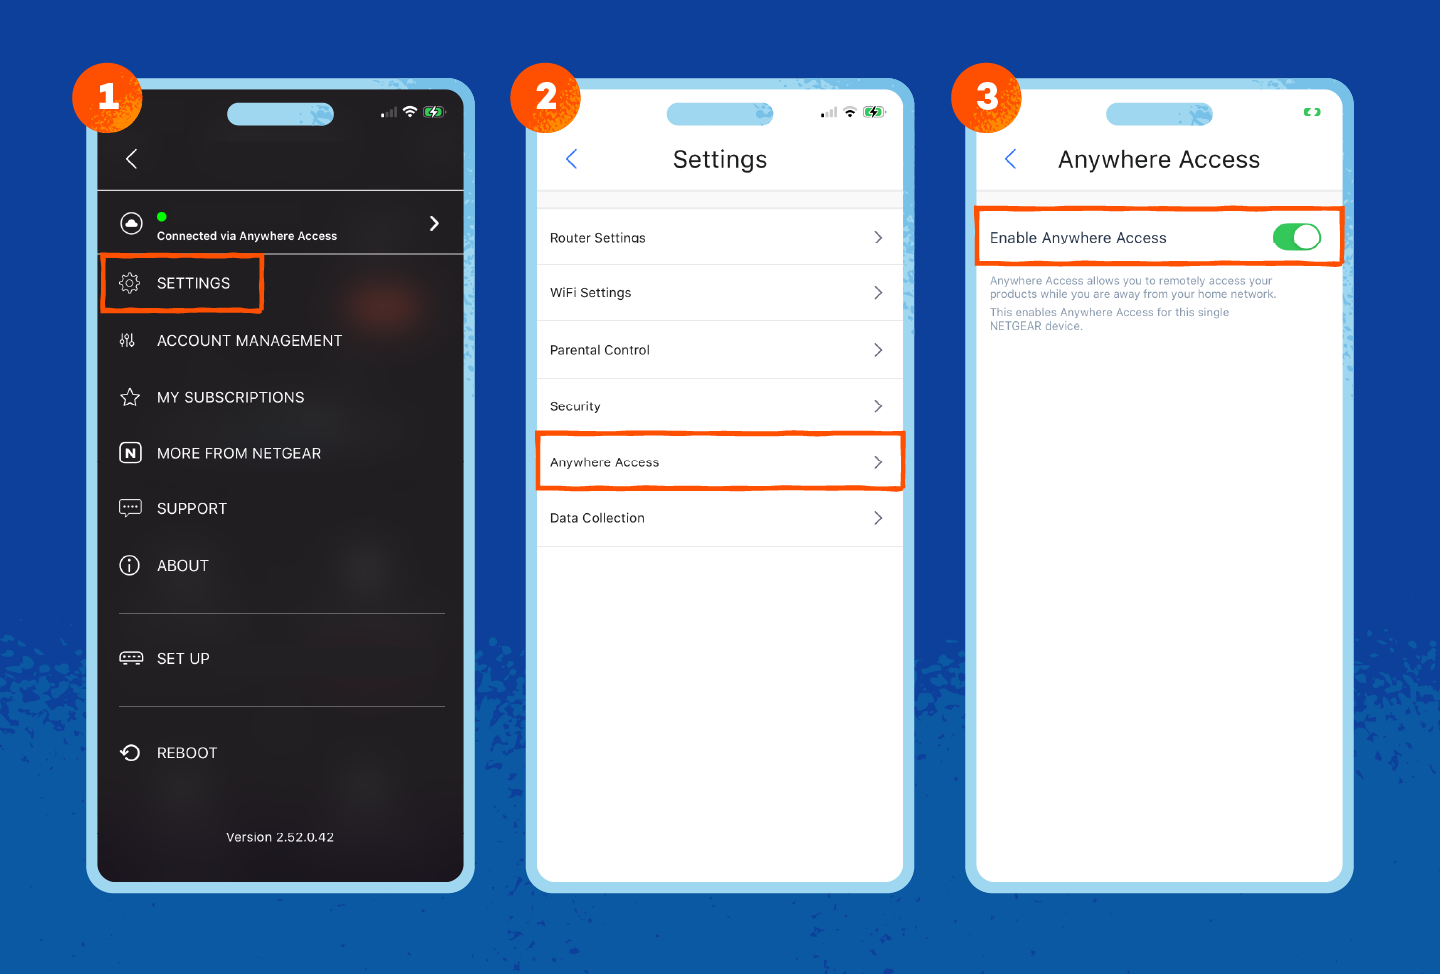
9. Turn Off Remote Management
A router’s remote management settings leave a port open for remote management software. While convenient for local desktop access, it leaves your computer vulnerable to cybercriminals who may launch botnet attacks that take over your computer.
Here’s how to turn off your router’s remote management:
- From your router’s admin page, search for remote access settings under Settings, Advanced, Administration, or System Tools.
- Look for Remote Management or Web Access from WAN
- Uncheck the box next to it and click Apply or Save.
10. Isolate Smart Devices
Smart lightbulbs, baby monitors and other IoT devices are less secure than regular devices like your phone or computer. They’re prime targets for wardriving attacks, where malicious criminals drive around looking for vulnerable networks.
Isolating smart devices on their own network prevents cybercriminals from using them as a vehicle to access your regular devices. That way, if a criminal gets access to your smart network, they can only jump between different smart devices, not your laptop and smartphone.
You can use your guest network to isolate smart devices. Otherwise, you can set up a virtual local area network (VLAN) through these steps:
- From your router’s admin panel, look for VLAN Settings (or Virtual Networks).
- Add a new VLAN with a random ID with a descriptive name (like IoT Devices).
- Assign it an IP address (like 192.168.20.1) and a subnet mask (usually 255.255.255.0).
- Enable the DHCP server and create an IP pool range (192.168.20.100 to .254).
Some routers will set these up automatically, so check with your ISP for detailed instructions.
11. Keep Your Router in a Secure Location
If you’re throwing a house party or inviting friends over, keeping your router out in the open can be a bit risky. Some guests may not realize they’re doing anything wrong by pressing the WPS button or resetting the router.
Place your router in a hard-to-reach place that’s a bit off the ground. That way, you know exactly where it is if you need to reset it. Tucking it away also reduces the likelihood of unauthorized access.
12. Monitor Your Network
Finding a neighbor on your network is the wireless equivalent of finding an extension cord running from your house to theirs. Monitoring your network can spot when neighbors steal your bandwidth, which can be frustrating if you’re working within data limits.
To remove unwanted devices from your network, select Block or Blacklist in your router’s admin panel, under Connected Devices.
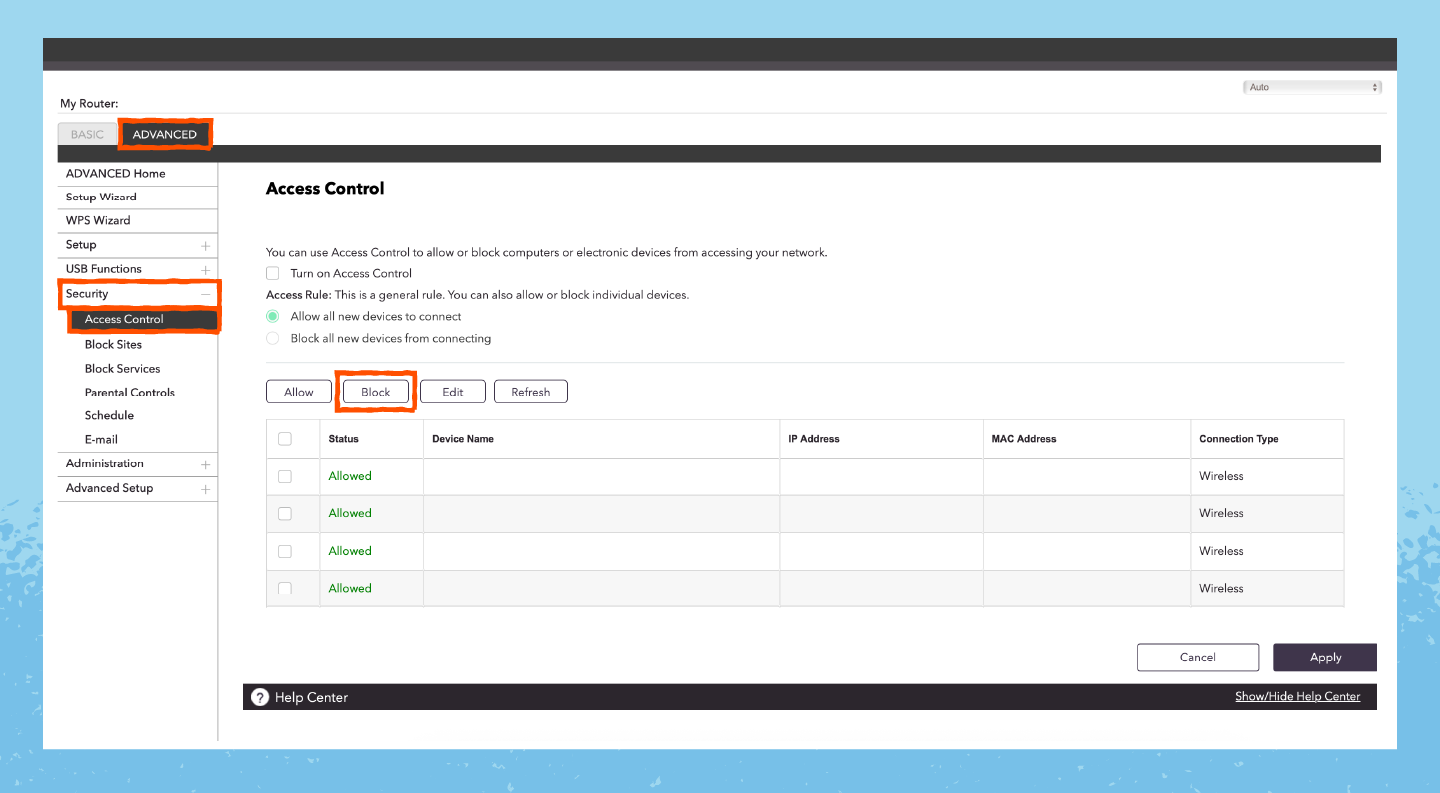
If new devices keep coming back, now’s the time to change your router’s password.
13. Turn Off Your Network (When Not Using It)
Turn off your network when you aren’t using it so people can’t access it. This can save you a bit of money on your electricity bill while also protecting your devices when you aren’t looking at them.
Some routers have settings that let you turn it off at certain times, such as overnight. Check with your ISP or use their app to see if they offer a way to turn this off without you having to dig through the admin panel.
14. Use MAC Address Filtering
Media Access Control (MAC) address filtering controls which devices can connect to your Wi-Fi network. With it, you can permanently block unwanted devices from your network. This is more effective than IP address blocking, as it’s much harder to change a device’s MAC address.
Here’s how to filter out devices by their MAC address:
- From your router’s admin panel, search for the Wireless, Advanced or Security tab.
- Look for options labeled MAC Filtering, Access Control or Wireless MAC Filter.
- Toggle the feature on, then look through Connected Devices to review what should be there.
While rare, some cybercriminals can engage in MAC address spoofing, faking their MAC address to appear to come from a new device. This is more common with man-in-the-middle (MitM) attacks, where fellow devices on your network intercept and redirect your internet traffic.
Securing Your Home Network’s Devices
Next, you’ll want to secure the devices on your home network to protect them from cybercriminals and malicious software attacks.
15. Use Antivirus Software
Antivirus software protects the devices on your home network from malicious viruses, like worms that can spread across network devices. This software often blocks malware on devices, but an antivirus won’t stop malware from moving between them.
Some tools, like Panda Dome Essential, offer Wi-Fi protection to spot dangerous networks, see which devices have connected and continuously monitor network activity for attacks. This protects all devices using the internet, even when you’re using public Wi-Fi.
16. Use a Device Firewall
Device firewalls automatically block all connection requests you didn’t make and are enabled automatically on most devices. If your firewall is off, it may indicate that your device has a virus.
Here’s how to check on your device’s firewall on Windows:
- Select Start and search for Windows Security.
- Choose Firewall & network protection.
- Toggle on the Microsoft Defender Firewall.
And your firewall on Mac:
- Select the Apple Menu and then System Settings.
- Click Network on your left-hand menu.
- Select Firewall and make sure it’s toggled on.
Neither Android nor iOS devices have user-facing firewall controls. Instead, those are on in the background.
17. Use a VPN
A virtual private network (VPN) encrypts your device’s connection, keeping it private. While this won’t protect your network connection from malware, it can hide your IP address, making it much harder to locate your device and the local network it’s on.
Panda Dome VPN protects up to one device on your network with unlimited MB and over 60 virtual locations for just $12 per year. For protection of up to 5 devices, you can pay $30 for coverage on Windows, Macs, Android devices and Apple phones.
18. Back Up Your Data
Backing up your data is good protection in case your first line of defense fails. Having a backup of this important data protects you from ransomware attacks, in which cybercriminals steal your data and demand a ransom to return it.
To back up your data, consider the 3-2-1 backup rule:
- Three copies of your data
- Stored on two types of media (on the cloud and physical)
- With one copy kept off-site to protect against physical theft
Protect Your Home Network’s Devices With Panda Security
Securing your home network starts with your router and extends to the devices on your network. Thankfully, you don’t have to pay an exorbitant fee to get quality protection.
Panda Dome Essential protects your devices with built-in Wi-Fi protection that scans networks for safety, detects which devices have joined the network, and monitors the network for incoming threats, such as hacker attacks.
Buy it today to stay safe with a top-rated product (according to AV-TEST results).