For files deleted within 30 days (before your Trash removes them):
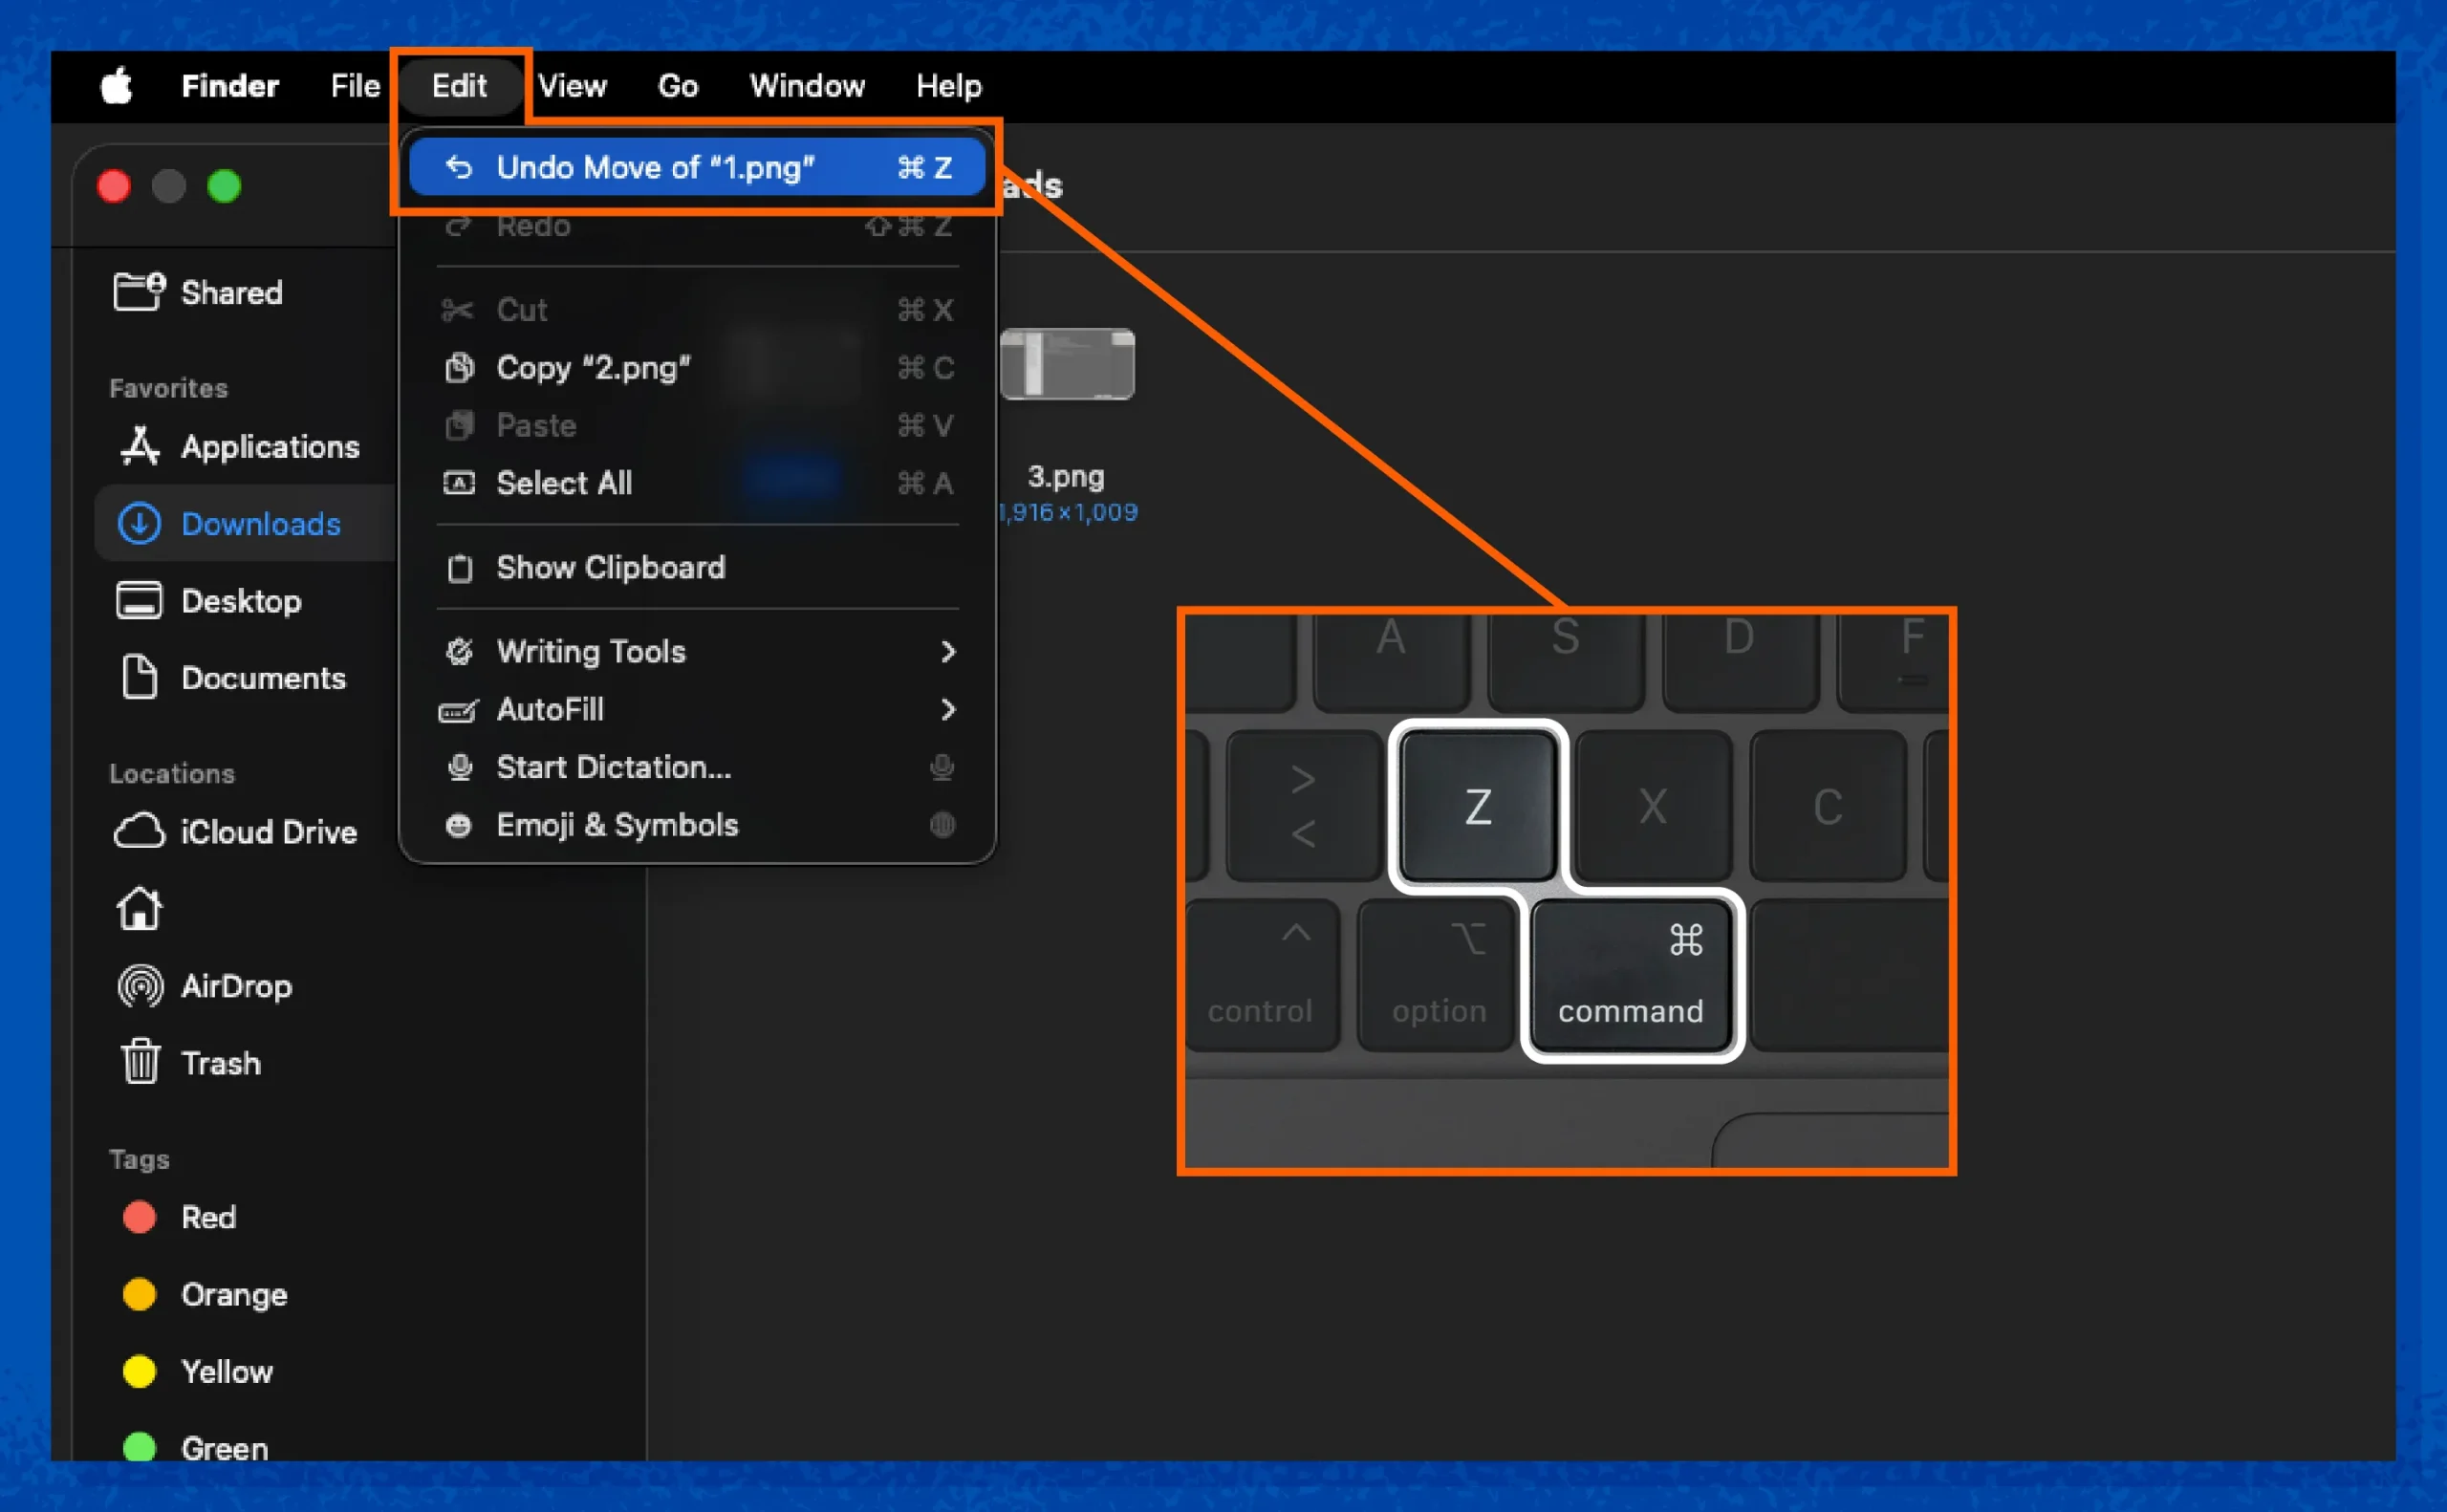
- From your menu bar, select Edit -> Undo Move
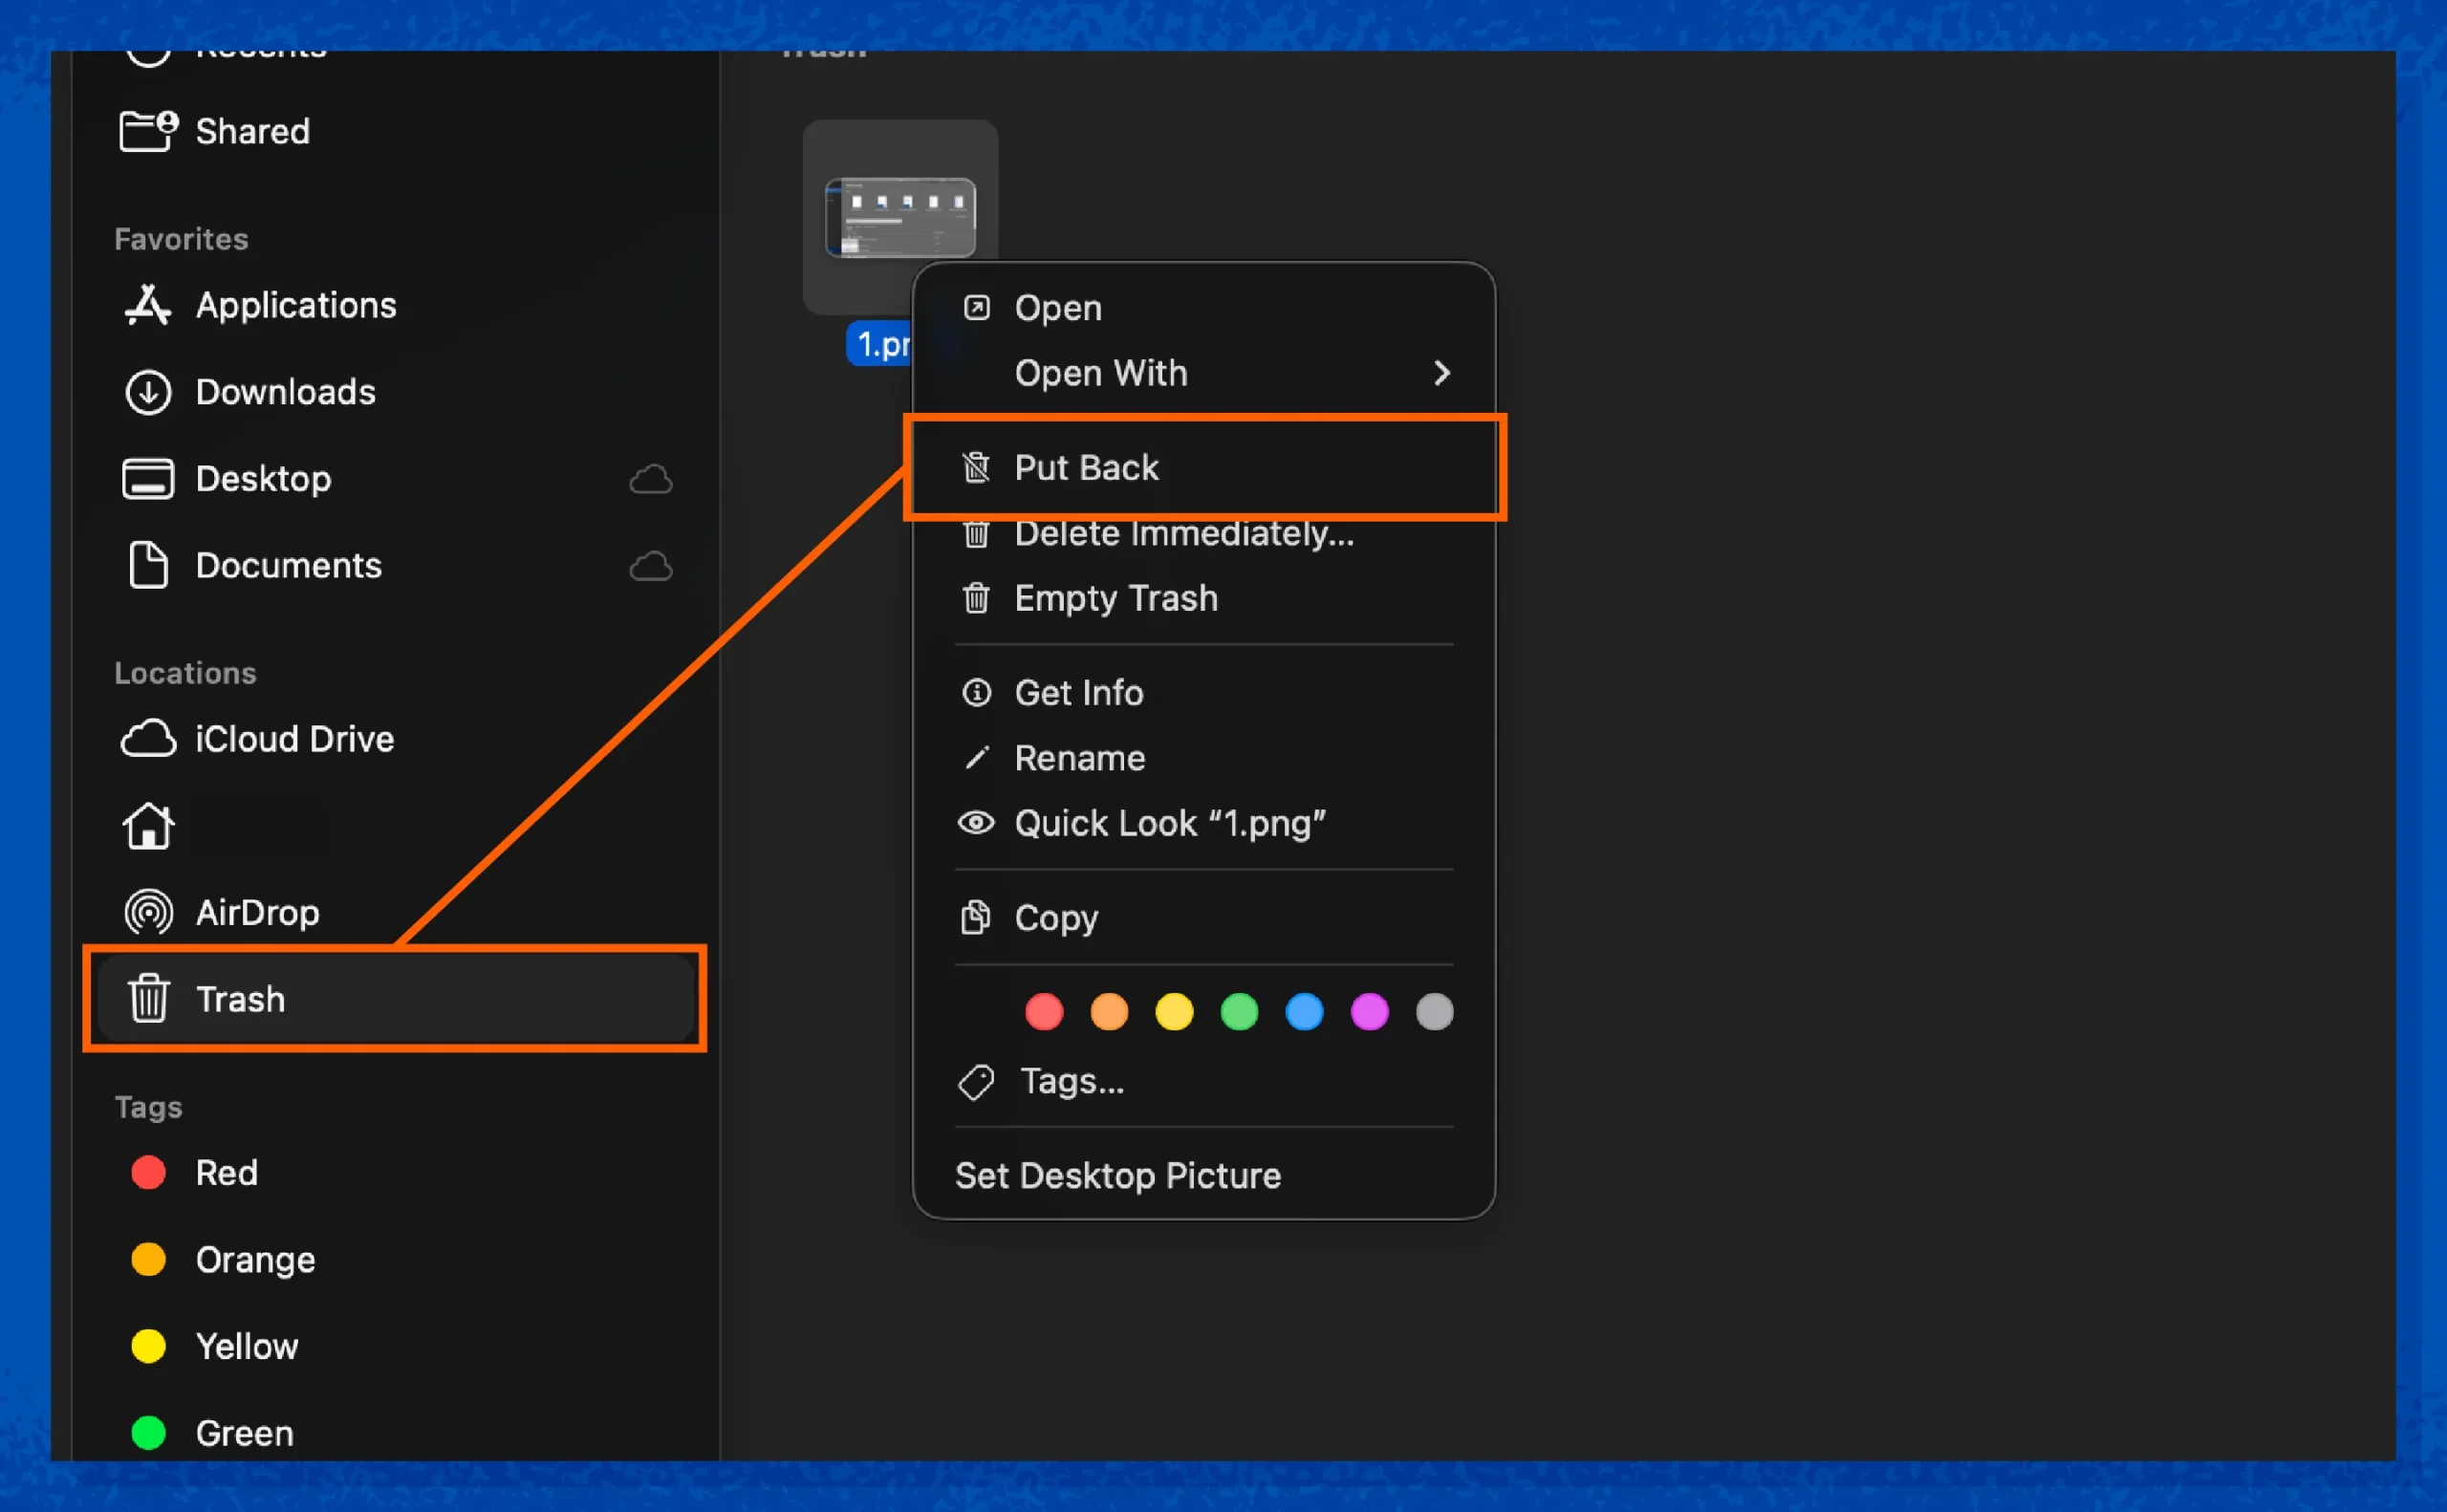
- Trash -> Right-click file -> Put Back
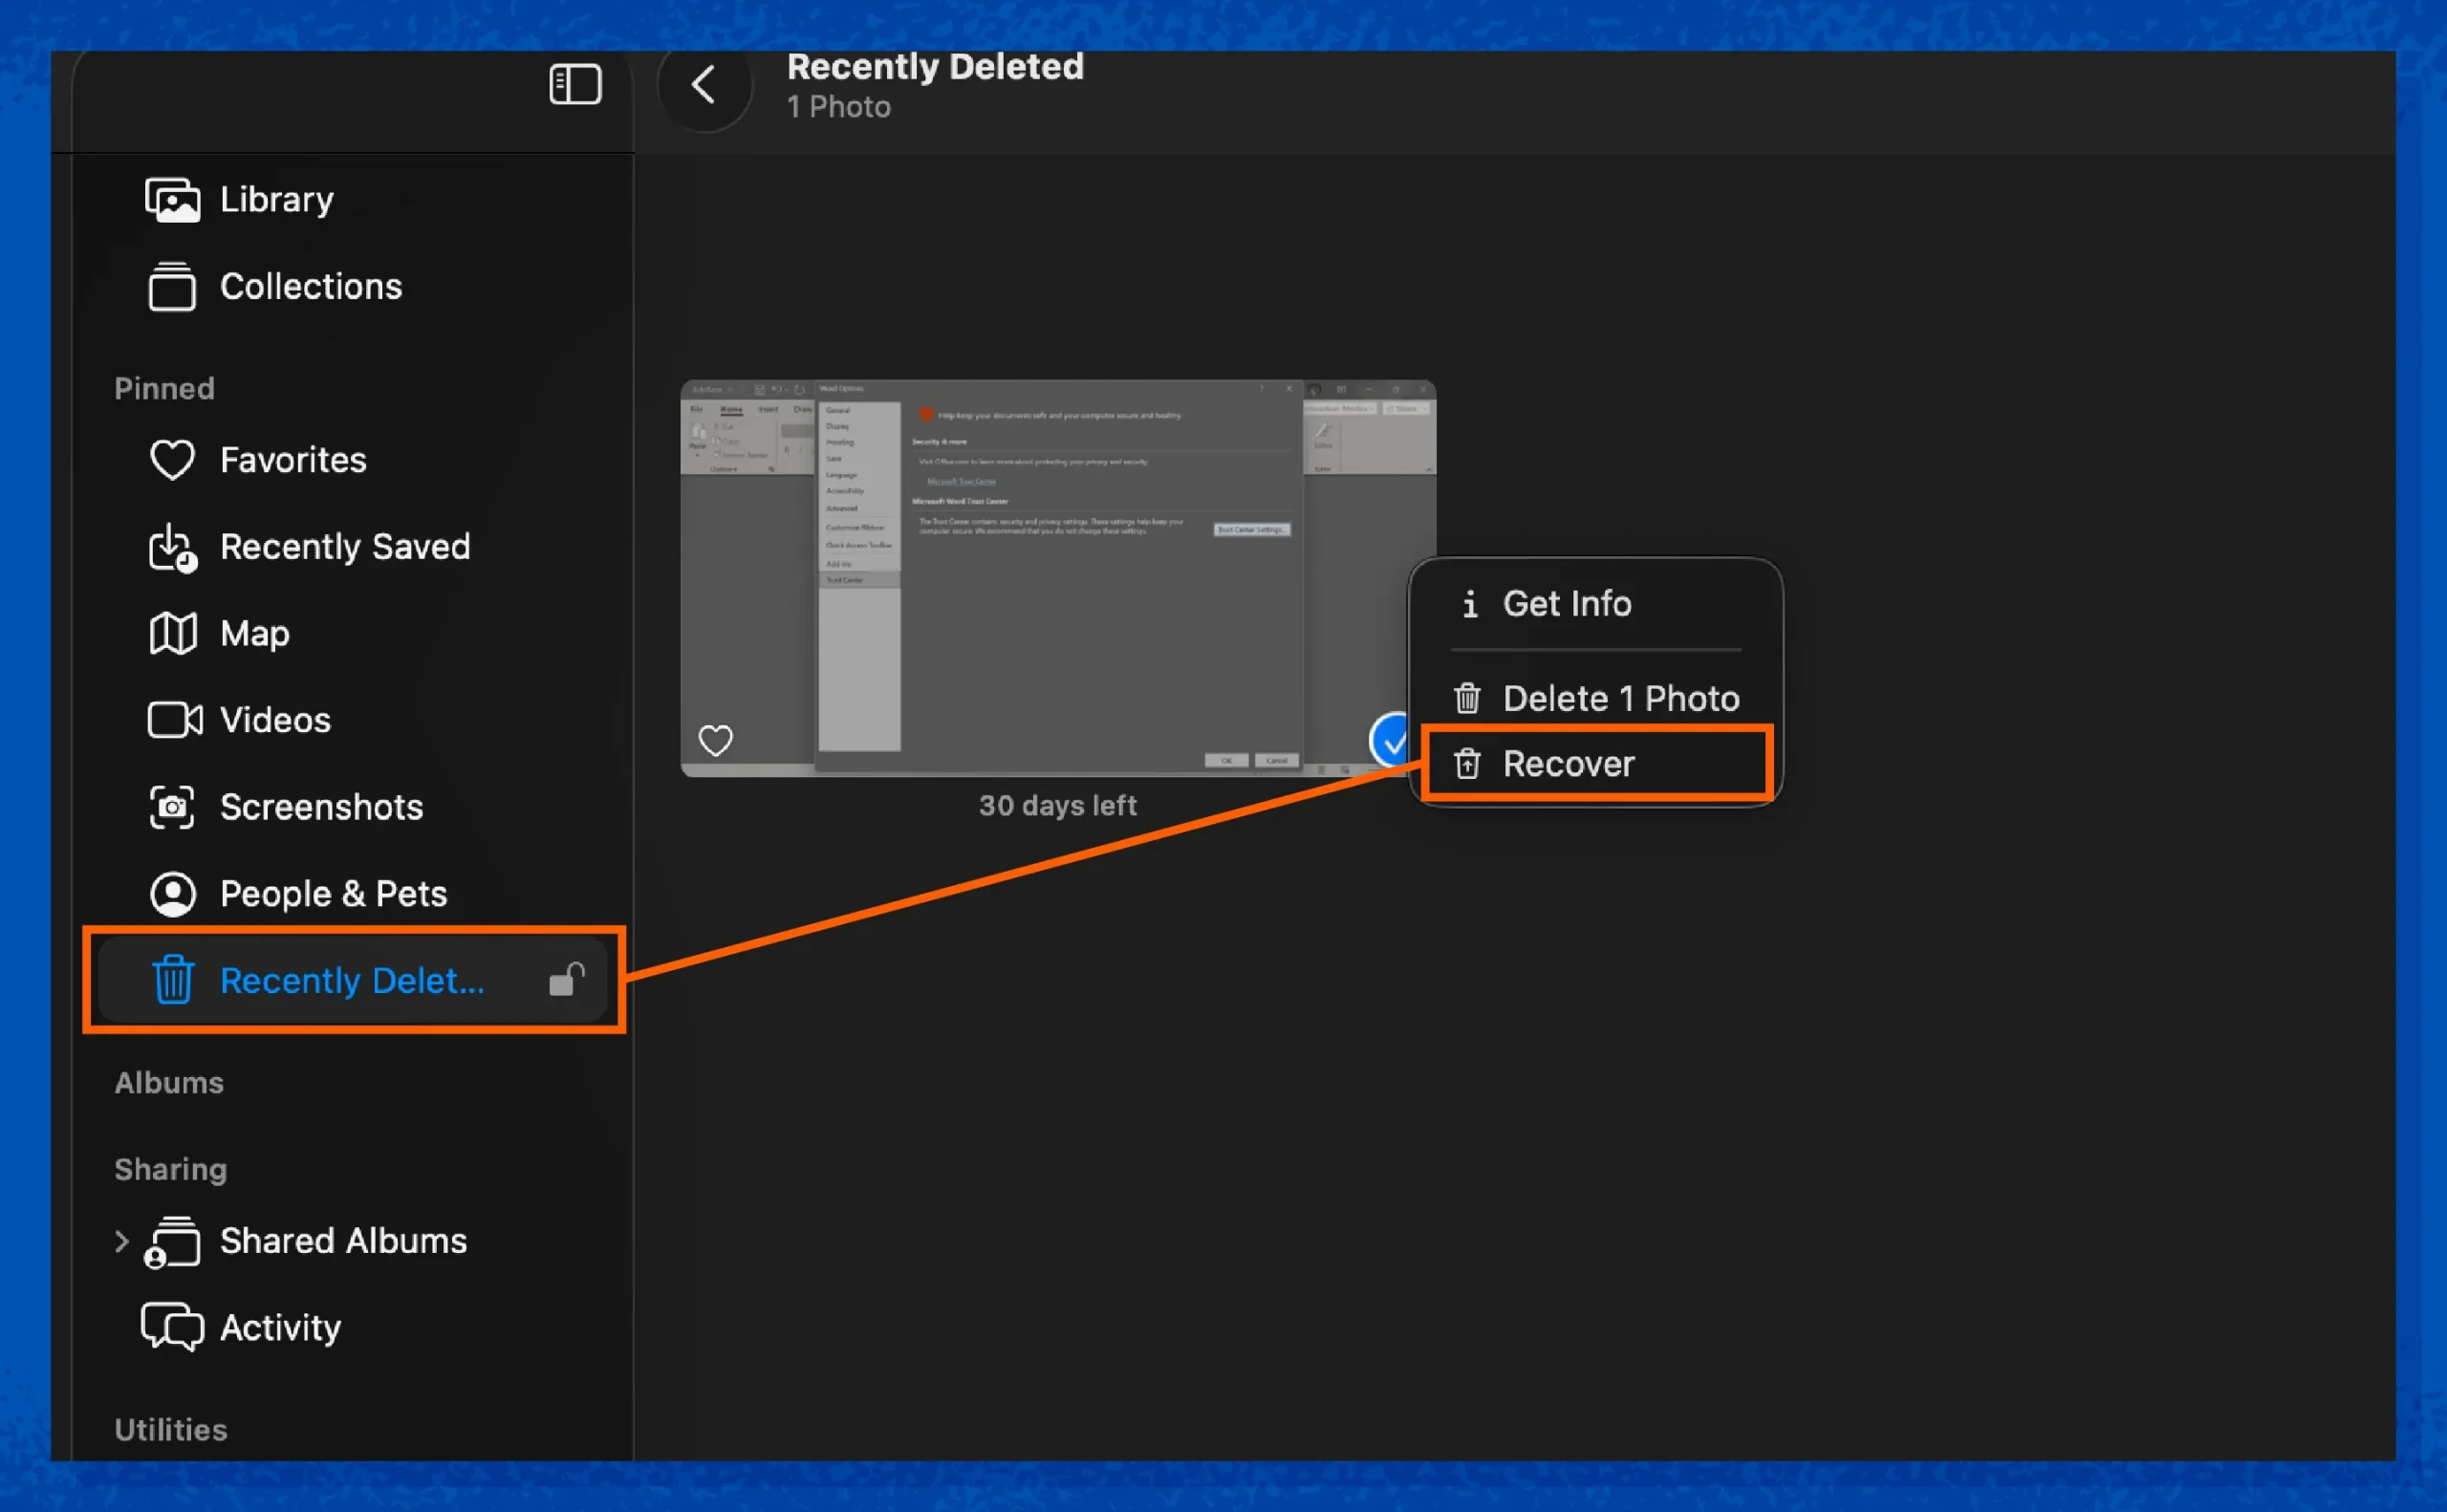
- Photos app -> Enter password -> Recently Deleted -> Right-click file -> Recover
For permanently deleted files from more than 30 days ago:
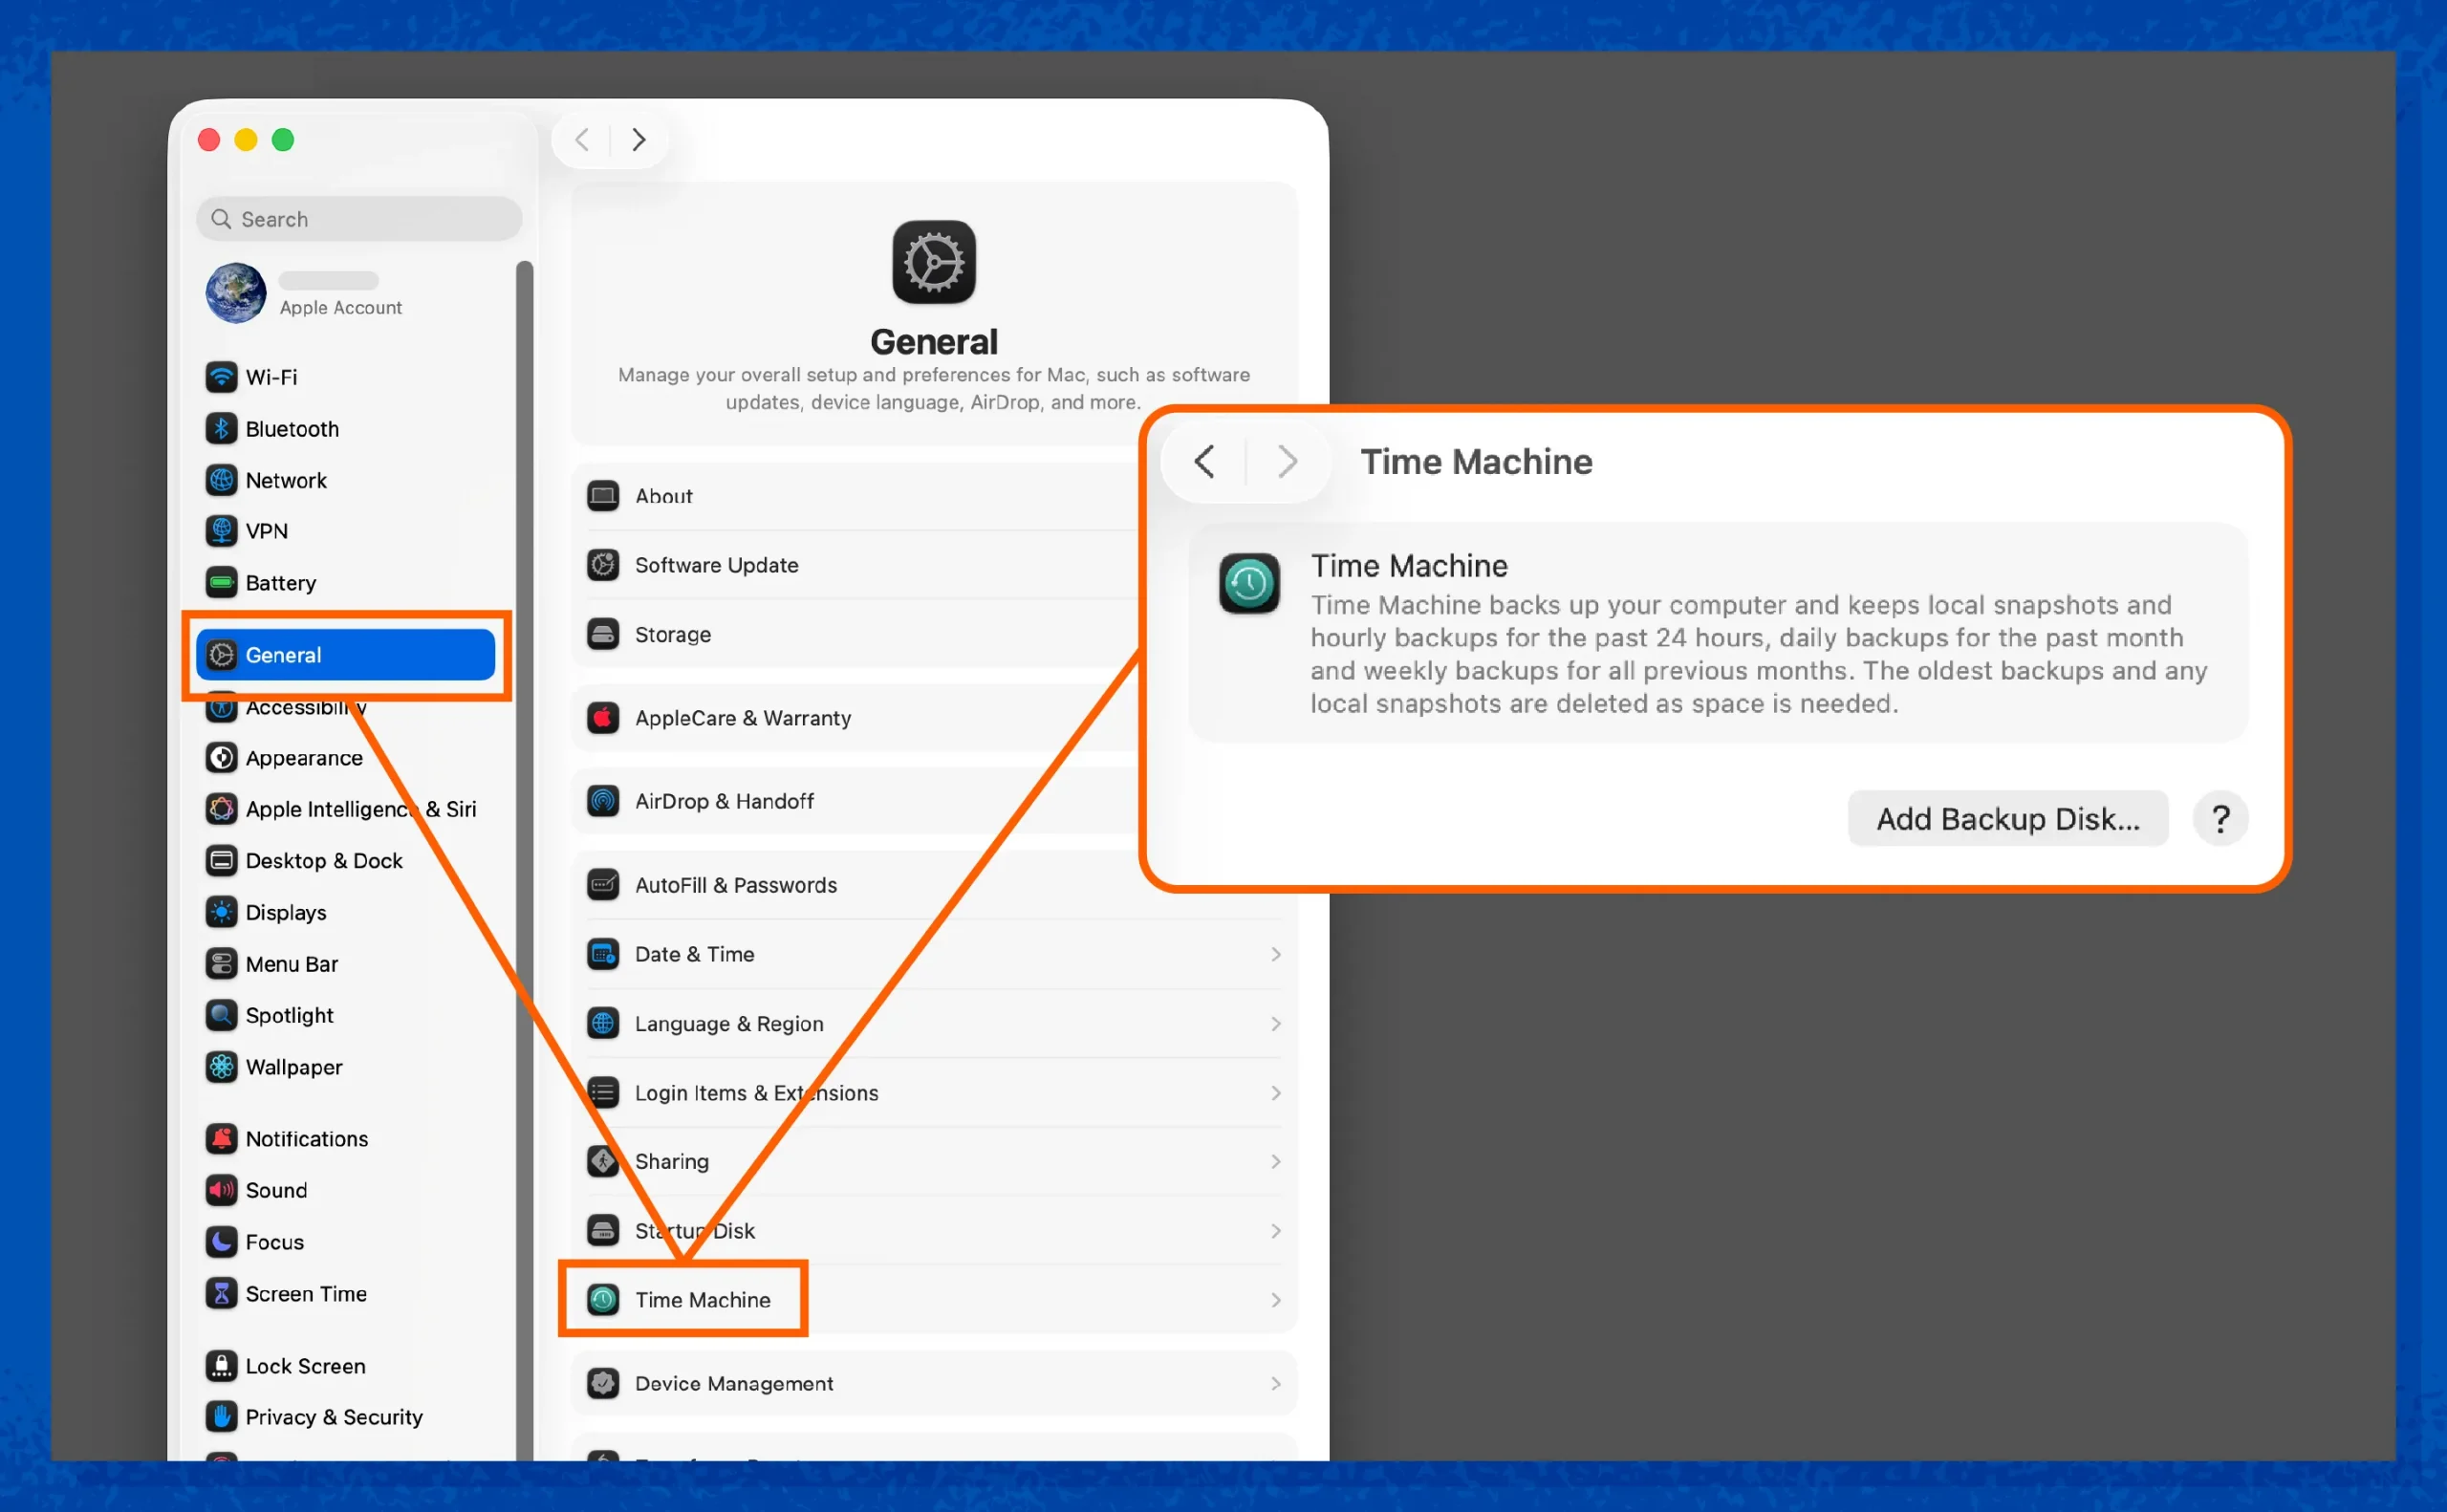
- System Settings -> General -> Time Machine -> Add Backup Disk -> Back Up
- Consider data recovery software for advanced file recovery when all other options aren’t working.
You might be panicking if you’ve accidentally deleted an important file. Thankfully, there are a few easy ways to get it back, even if it’s no longer in your trash.
We went through the process on our own Mac to show you how to do it yourself. Read on to learn five different ways to restore your deleted files on your Mac computer.
1. Undo The Deletion from Finder
If you realize your mistake immediately, you can recover a deleted file by clicking Edit -> Undo Move from your menu bar (upper left) or pressing CMD + Z on your keyboard, restoring your file to its original location.
2. Restore Recently Deleted Files from Trash
You can also recover deleted items from the trash by right-clicking on the file and selecting Put Back. Like Undo, this returns your file to its original location.
3. Restore from Recently Deleted
Some built-in macOS apps, like Photos and iCloud, have a Recently Deleted folder that stores files for 30 days before permanently deleting them.
To recover a deleted file on your Mac Photos app:
- Select Recently Deleted on the left-hand menu.
- Enter your password or Touch ID.
- Right-click the file and select Recover.
iCloud Tip:
Recover lost files from your Mac’s cloud storage by going to the iCloud recovery page. Deleted iCloud files usually don’t end up in your Mac’s local trash.
If you deleted your file more than 30 days ago, you’ll need to use your Mac’s Time Machine or File Recovery software.
4. Use Time Machine to Recover Long-deleted Files
Apple’s Time Machine automatically backs up your data to an external drive or USB stick, which is handy if you wipe your drive or forget to restore files to the trash. You can do this by opening System Settings -> Time Machine -> Restore.
If you haven’t set it up yet, you’ll need external storage with double your Mac’s capacity. Make sure you have an extra one, as these drives can’t be used for anything else once set up.
Follow these steps to create your backup drive:
- Go to your Mac’s System Settings.
- From the sidebar, select General and click Time Machine.
- Click Add Backup Disk (or the “+” button).
- Erase the storage (if necessary) and follow the on-screen prompts.
- Return to the Time Machine menu and select Back Up.
As long as your Mac stays connected to the drive, it will continue to create backups every hour. If full, it will delete old backups to create new ones. You can change how often this happens from the Time Machine menu. DO NOT disconnect the drive while a backup is in progress, as you might corrupt it and have to start over.
For better security, you can enable Encrypt Backup in the Time Machine menu. This security tool protects your backup drive from unauthorized access with a password, which you’ll need to restore deleted files later.
5. Use Data Recovery Software
When recovery is impossible through regular means, data recovery software can help. These tools help get your files from “dead” computers that won’t power on. It can also help when with solid-state drives (SSDs) if you’ve waited too long to pull it from the trash.
Here are a few options:
- Disk Drill: Supports up to 100 MB for free, with “pro” versions offering lifetime memberships.
- PhotoRec: Recovers lost images, even when your Mac’s files are corrupted.
- EaseUS: Supports over 1000 file types, including Macs and their external storage devices.
- Stellar: Paid software that recovers data from hard disks, external drives, SD cards, and SSDs.
Cybercriminals can also build these tools into malicious files to steal your sensitive information. Thankfully, you can stay safe with Panda Security’s free antivirus software to spot and stop these intruders before they can collect your sensitive files.
How to Prevent File Loss on Your Mac
Lost data could be a sign of a ransomware attack that’s encrypting (or scrambling) your files and demanding a ransom payment to restore access. Here are some preventative measures to protect yourself from permanently lost files:
- 3-2-1 backup strategy: Create three copies of your data in two ways, with at least one being outside your home. For example, you could use an external drive and two cloud storage drives for extra security against data loss. Try to do this at least once a year (like during World Backup Day).
- Use iCloud Drive: One of the two options is iCloud Drive, which is free and integrates with your Mac for automatic backups. You can set up automatic backups in System Settings -> iCloud -> See All, then select what’s automatically backed up.
- Get antivirus software: Anti-malware tools with real-time protection, like Panda Dome, can spot and block file-destroying malware before it infects your Mac.
- Regular updates: Your Mac needs regular updates to patch security holes in older software versions that malware can exploit. Check for updates in System Settings -> General -> Software Update, to see if there’s a new version.
Keep Your Files Safe With Panda Security
An accidental deletion is painless to recover from, as long as you have Time Machine set up to restore older versions. If files continue to vanish despite recovering them, you may have a Mac virus.
Panda Dome’s free antivirus software helps block malicious viruses with real-time protection. With recognition from testing labs like AVTest and AVComparatives, you can trust that it will protect your Mac’s files without the slowdowns other antivirus software gives you.
Mac File Recovery FAQ
Still have some questions about recovering your data on Macs? Here are some answers to common questions.
Can you recover deleted files after emptying the Trash on Mac?
Yes, you can recover deleted files after emptying your Mac’s trash by loading an old version of your Mac with Time Machine, by going to System Settings -> Time Machine -> Restore. You can also use data recovery software like EaseUS.
How long do deleted files stay in Mac Trash?
If automatic cleaning is on, deleted files remain in your trash for 30 days before permanent removal. If this setting is off, they remain until you empty your trash, taking up space in the process.
Does Mac have built-in file recovery?
Yes, a Mac’s native Time Machine tool recovers files after clicking Restore under the Time Machine menu. There are no alternative file recovery tools.
Is data recovery possible on SSDs?
In some cases, you may need to act fast, as SSDs overwrite and permanently delete faster than old-fashioned disk drives. You may need file recovery software, such as Stellar, to get them.