


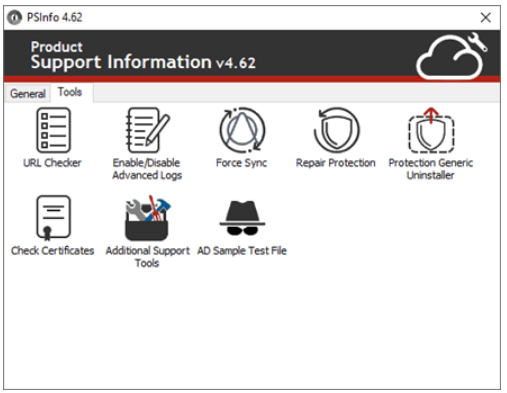
The PSInfo window has these tabs:
- General
On the General tab, you can use PSInfo to collect support-related information from an affected endpoint and send it to Support. For more information see, Get Started with PSInfo. - Tools
On the Tools tab, you can select from a set of tools to help you diagnose an issue with an affected endpoint.
- URL Checker
Verify the connectivity URLs that your endpoint security product requires. For more information, see PSInfo URL Checker - Enable or Disable Advanced Logs
Specify whether PSInfo sends advanced diagnostic log messages to Support. For more information, see PSInfo Enable Advanced Logs. - Force Sync
Refresh the endpoint agent communication with the endpoint security product. For more information, see PSInfo Force Sync. - Repair Protection
Repair your endpoint security product. For more information, see PSInfo Repair Protection. - Protection Generic Uninstaller
Fully uninstall your endpoint security product. For more information, see PSInfo Protection Generic Uninstaller. - Check Certificates
Retrieve and install missing root and CA certificates that your endpoint security product uses. For more information, see PSInfo Check Certificates. - Additional Support Tools
See additional tools you can use to troubleshoot your endpoint security product. For more information, see PSInfo Additional Support Tools. - AD Sample Test File
Run a sample of an unknown suspicious file to test your endpoint security product. For more information, see PSInfo AD Sample Test File.
You can use the Product Support Information (PSInfo) tool to collect support-related information from an affected endpoint computer. If you want to report a problem, you can send the support-related information to Support. PSInfo can also save the information locally as a .7Z file. You can use PSInfoViewer to review the contents of the .7Z file locally. For more information about .7Z files, see 7-Zip.
Install PSInfo
To install PSInfo:
- Type this URL into the address bar of your browser:
https://www.pandasecurity.com/psinfo - Press Enter. A .zip file downloads to your computer.
- Extract the PSInfo.exe file to a location of your choice.
To run PSInfo and collect support-related information:
- Run PSInfo.exe. The License Agreement page opens.
- Select the I Accept the Terms of this Agreement check box.
- Click Accept. The PSInfo window opens.
- Select the General tab.
- In the Account ID text box, if not already prepopulated, type your account ID number. If you do not have an endpoint security product installed, the prepoulation does not take place and you must manually provide your account number.
- From the Product drop-down list, select the product that you want to create a report for. If you do not have an endpoint security product installed, the prepopulation does not take place and you must manually select a product from the drop-down list.
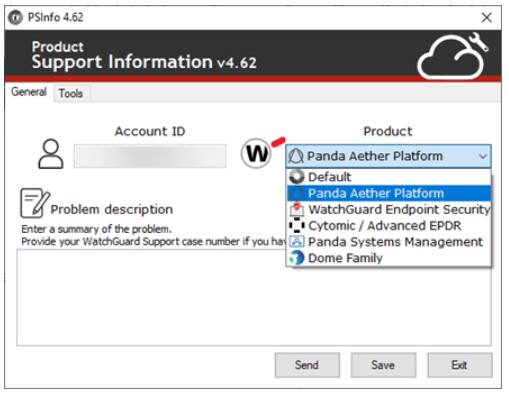
- In the Problem Description text box, type a summary of the problem that you are having.
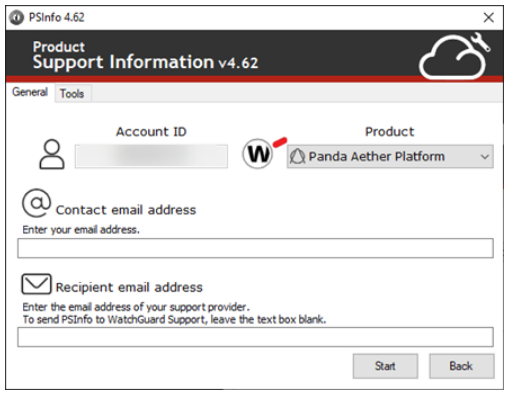
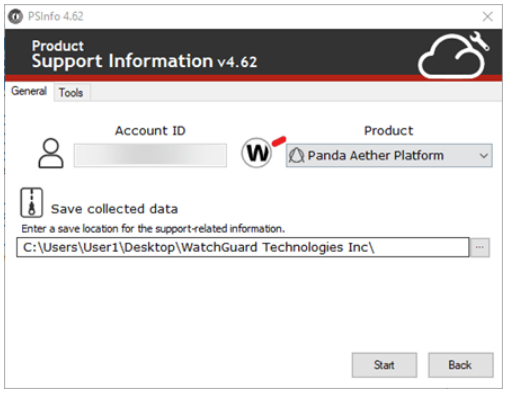
- Click Send to send support-related information of the computer. If you select the Save checkbox, PSInfo generates and saves the information in a .7Z file. This option prevents the information from being automatically sent to Support.
- In the Contact Email Address text box, type a contact email address.
- In Recipient Email Address, enter the email address of your Support provider. To send the PSInfo to WatchGuard Support, leave the text box blank.

- Click Start. PSInfo collects support-related information in the background. A Collecting Data icon shows in the system tray of the computer while the collection takes place. When collection completes, a message shows in the system tray that states that collection is complete. The support-related information is then sent to Support.
In some rare case, after an extended period of time, PSInfo might not generate a local .7Z file. If this is the case:
- On your computer, browse to the temp folder. For example, if you use a Microsoft Windows computer, browse to: C:\Windows\Temp
- Compress the PSInfo folder as a .7Z file.
- Send the .7Z file to Support. If the temp folder does not contain the PSInfo folder, compress and save these folders as a .7Z file. You can then send the .7Z file to Support:
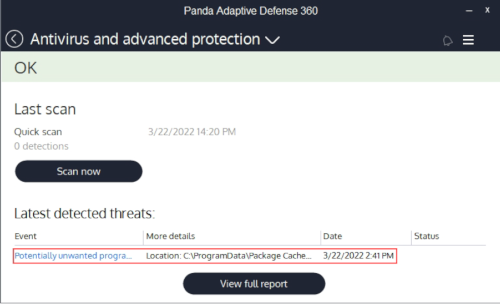
- C:\ProgramData\Panda Security\Panda Aether Agent\Logs
- C:\ProgramData\Panda Security\Panda Aether Agent\Messages
- C:\ProgramData\Panda Security\PSLogs
PSInfo URL Checker
From PSInfo, you can use the URL Checker tool to verify the connectivity of the URLs that your endpoint security product requires. The tool helps to determine whether any URLs do not communicate with the endpoint agent. Common scenarios are when communication with the endpoint agent fails, or when the antivirus does not send telemetry.
To check the connectivity URLs of your product:
- Run PSInfo.exe. The PSInfo dialog box opens.
- Select the Tools tab.
- Double-click URL Checker. The URL Checker dialog box opens.
- (Optional) If you want to use a proxy, select the Use a Proxy Server check box. In the Address, Username, and Password text boxes, type your proxy server account credentials.
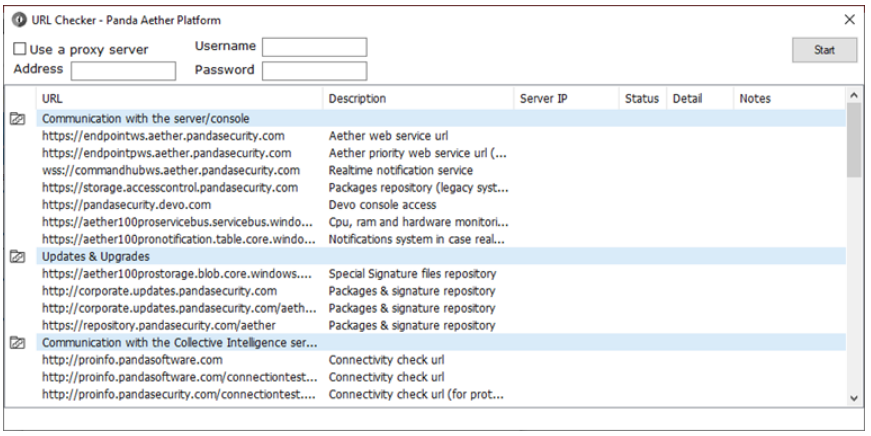
- Click Start. You can click Stop at any time to stop the tool.
- After the check completes, verify that each entry in the Detail column reports as OK.
- If the Detail column shows an issue, review the text in the Notes column for a possible cause.
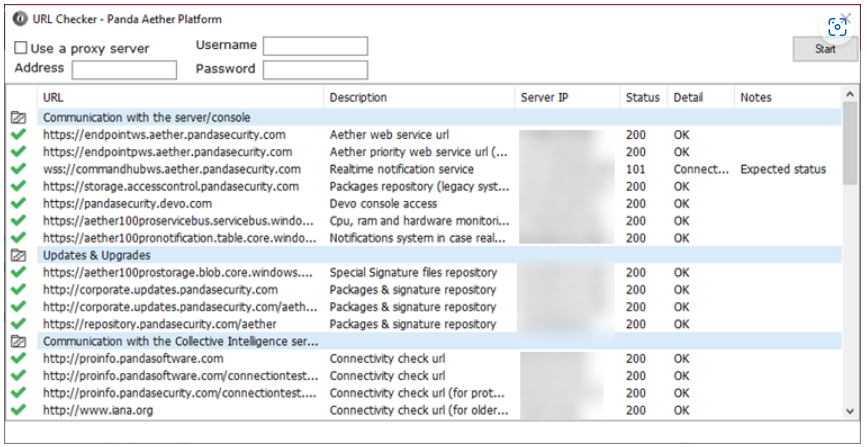
- When you finish, close the URL Checker dialog box.
URL Checker icons indicate the status of a communication URL. You can review the text in the Notes column for information about an issue that might show.
 Communication connection is unsuccessful.
 Communication connection is successful.
 Communication connection is successful, but the communication is not as URL Checker expects. This usually occurs when headers or document bodies are different to the patterns that URL Checker expects.
 Communication connection is successful, but the communication pattern is different to what URL Checker expects. This usually occurs when a web server updates a requested document and the pattern is a different pattern to what URL Checker expects.
 Communication connection is successful, but the certificate chain fails.
From PSInfo, you can enable or disable advanced logs. When you enable advanced logs, the PSInfo tool collects support-related information that includes the maximum amount of detail. Advanced logs collect as much information as possible. Collection includes information about verbose logs, agent services, protection services, communication messages with WatchGuard Cloud, and file traces.
When you enable advanced logs, the logs supplement the support-related information that PSInfo generates when you report a case. You should disable advanced logs, and only enable them when Support requests you to as part of a support case.
When you enable advanced logs, the support-related logs that the PSInfo tool generates include more information, but require more storage on your computer.
To enable advanced logs:
- Run PSInfo.exe. The PSInfo dialog box opens.
- Select the Tools tab.
- Double-click Enable or Disable Advanced Logs. The Advanced Logs dialog box opens.
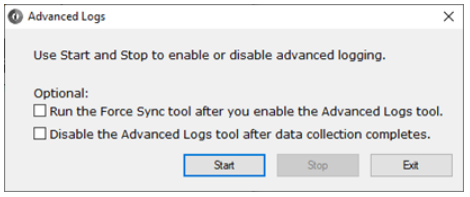
- (Optional) To force a sync of the product after you enable advanced logs, select the Run Force Sync After Enabling Advanced Logs check box. For more information, see PSInfo Force Sync.
- (Optional) To collect advanced logs one time only, select the Disable Advanced Logs After Collection Phase checkbox.
- Click Start.
- From your computer, replicate your issue. If it is a visual issue, you can take screenshots that might help Support to resolve your case.
- When you no longer want to collect logs, click Stop.
From PSInfo, you can use the Force Sync tool to refresh endpoint agent communication with an endpoint security product. When the sync takes place, the tool runs tasks that refresh configurations, perform signature updates, and refresh policies. You can use this tool if you notice that a device reports an out of date last communication time in the endpoint administration console, or a configuration change that you made does not show.
To force a sync of configurations, signature updates, and policies:
- Run PSInfo.exe. The PSInfo dialog box opens.
- Select the Tools tab.
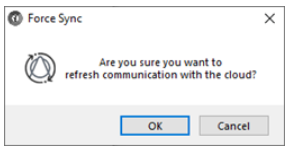
- Double-click Force Sync. The Force Sync dialog box opens.
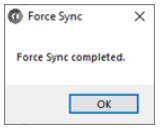
- Click OK. The Force Sync tool runs as a background process. When the process completes, a message appears.
- Click OK.
On occasion, your endpoint agent protection might report an issue with the agent, the antivirus protection services might not start automatically, or an error might show in application or system event logs. To rectify issues such as these, you can use the Repair Protection tool to repair the endpoint agent protection on your computer.
To force a repair of your endpoint agent protection:
- Run PSInfo.exe. The PSInfo dialog box opens.
- Select the Tools tab.
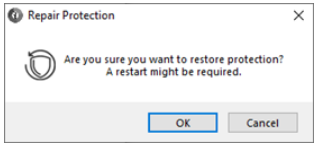
- Double-click Repair Protection. The Repair Protection dialog box opens.
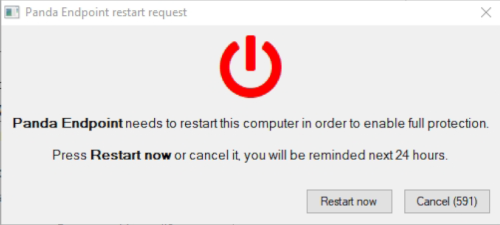
- Click OK. The tool runs as a background process until it completes. When the tool completes a repair, a prompt to restart your computer shows.
- Click Restart Now.
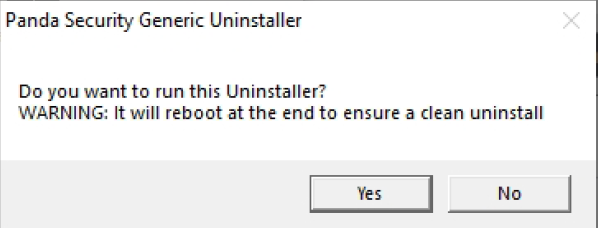
Occasionally, when you try to uninstall your endpoint security product, the uninstall might not complete successfully. From PSInfo, you can use the Protection Generic Uninstaller tool to fully uninstall your endpoint security product if a previous uninstall did not fully complete.
To uninstall your endpoint security product:
- Run PSInfo.exe. The PSInfo dialog box opens.
- Select the Tools tab.
- Double-click Protection Generic Uninstaller. The Protection Generic Uninstaller dialog box opens.
- Click OK. The tool runs as a background process.
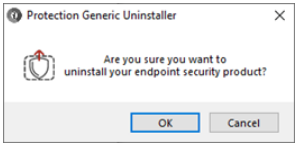
- If you protect your endpoint security product with an uninstall password, the tool prompts you to provide the password to continue with the uninstall process.
- Click Yes. The tool uninstalls your endpoint security product and reboots your computer.
From PSInfo, you can use the Check Certificates tool to retrieve and install missing root and certificate authority (CA) certificates that your endpoint security product requires. When you run the tool, it automatically installs any missing root certificates to your computer. The tool also gives you the option to install any missing CA certificates.
To check for missing certificates:
- Run PSInfo.exe. The PSInfo dialog box opens.
- Select the Tools tab.
- Double-click Check Certificates. The Check Certificates dialog box opens and lists the root and CA certificates that are on your computer.
- Click Add Missing. The tool automatically installs any missing root certificate and adds the certificate to the Trusted Root and CA Certificate List. The addition of CA certificates is optional. If there are no missing CA certificates, the Add Missing button is disabled.
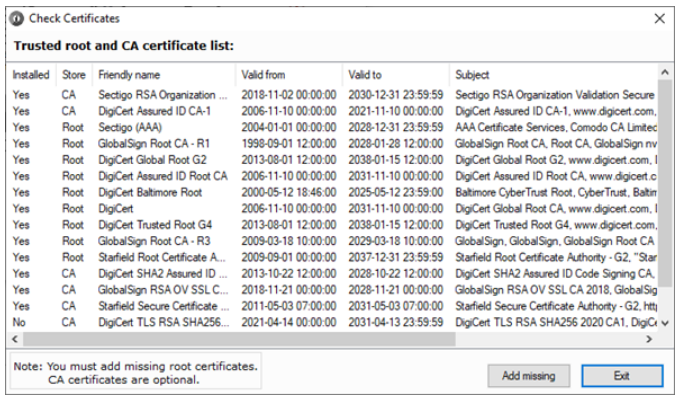
- Click Exit.
From PSInfo, you can use the Additional Support Tools option to find information about the tools that you can use to troubleshoot your endpoint security product. To see information about additional support tools:
- Run PSInfo.exe. The PSInfo dialog box opens.
- Select the Tools tab.
- Double-click Additional Support Tools. The Additional Tools Included in Product Support Information (PSInfo) page opens.
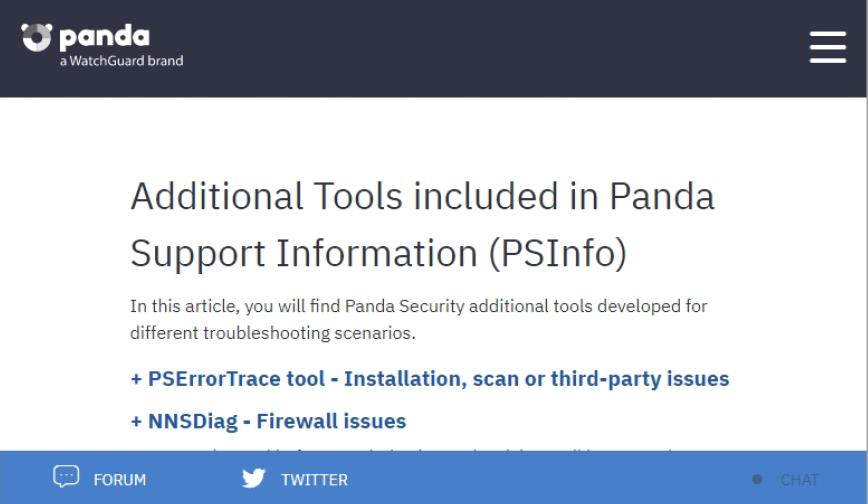
The Additional Tools Included in Panda Support Information page describes:
- PSErrorTrace
Gathers information to help diagnose issues related to the installation, scan, or compatibility of third-party software. - NNSDiag
Gathers information about third-party software issues, or gathers information when firewall protection blocks an Internet connection. - Windbg
Gathers information to determine why a process crashes. Gathers information by use of a postmortem dump.
From PSInfo, you can use the AD Sample Test File tool to run a test file of an unknown type. The test helps you to confirm that your endpoint protection works as you expect. The endpoint security product interprets the test file as suspicious. This enables you to safely test what the product does when a suspicious file runs on the endpoint.
To make sure that your endpoint security product tests, blocks, and reports a suspicious file, the tool generates a random portable executable (PE) file with a random MD5 hash. If there are no issues, the endpoint security product identifies the file as unknown, and then blocks the file. Make sure that Advanced Protection is in Lock mode. In Lock mode, your endpoint security product does not run any software that is in the process of classification or is already classified as malware. Software can only run after Advanced Protection verifies it as goodware. For more information, see Advanced Protection Operating Modes (Windows computers). To test your endpoint security product with a sample file:
- Run PSInfo.exe. The PSInfo dialog box opens.
- Select the Tools tab.
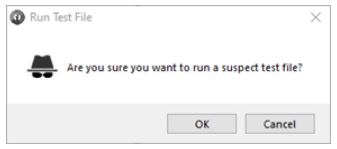
- Double-click AD Sample Test File. The Run Test File dialog box opens.
- Click OK. The AD Sample Test File tool runs as a background process and executes an unknown test file.
- After the AD Sample Test File tool runs the test file, click OK. The Run Test File dialog box opens when the tool completes the test file runs.
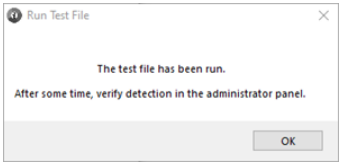
After some time, the endpoint security product on your computer finds and reports the sample file.