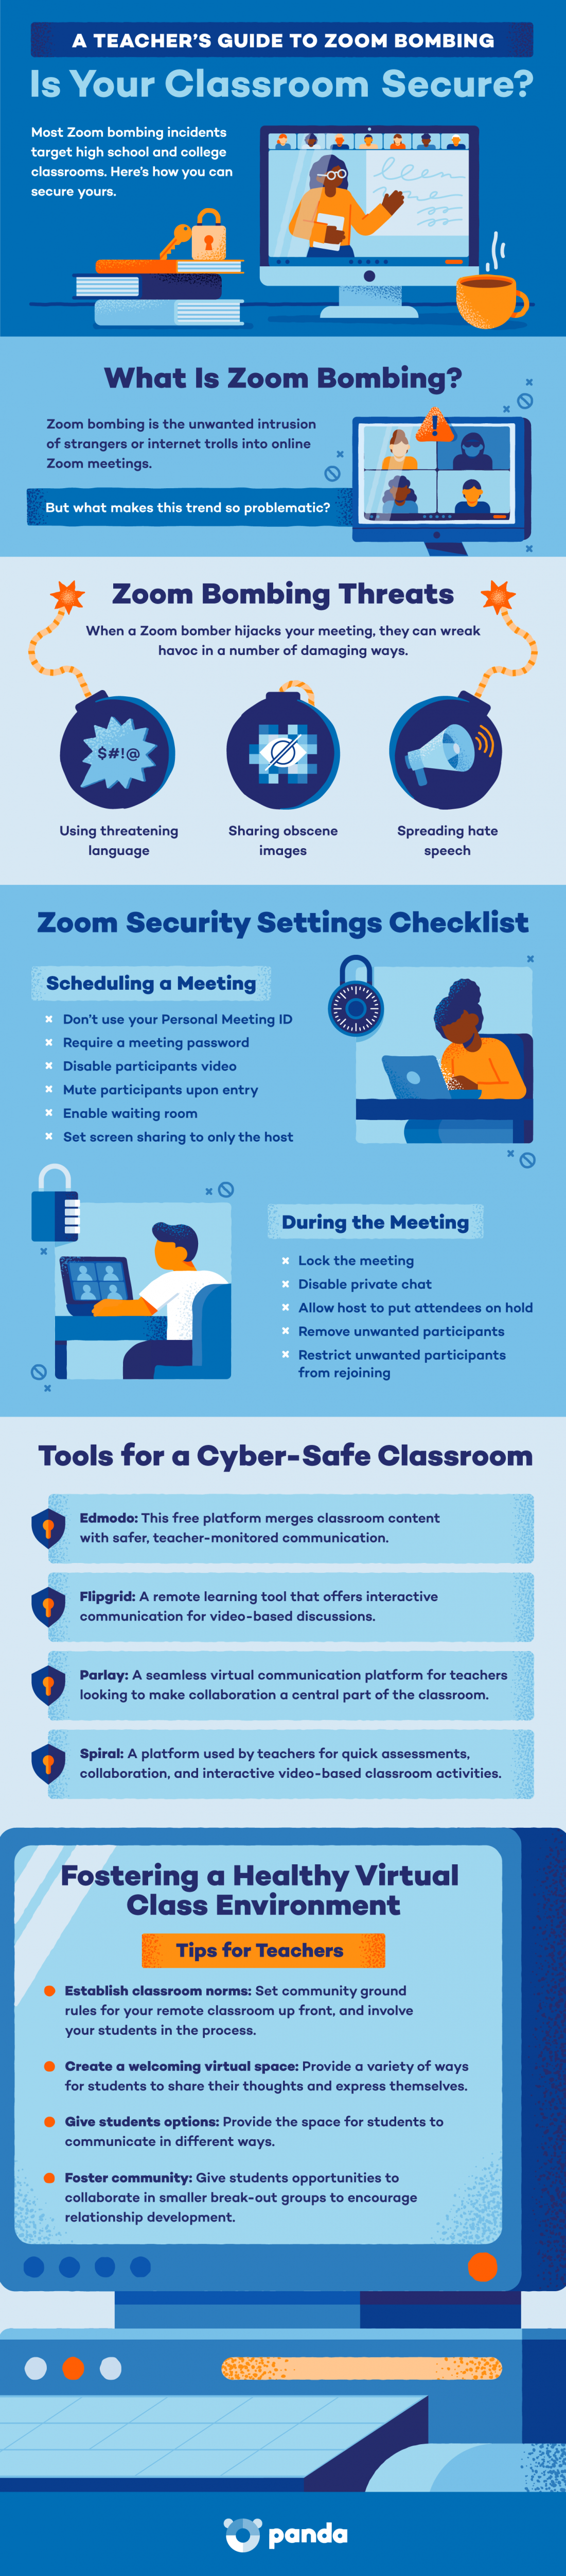
When COVID-19 took over last spring, Zoom quickly became a lifeline for students, classrooms and businesses who were forced to make the rapid shift to a remote environment. While Zoom’s video conferencing services have been critical in keeping us afloat amid the pandemic, a problematic trend known as “Zoom bombing” has emerged as a result.
Of the millions of users participating in Zoom calls, a portion of those are trolls whose goal is to hijack Zoom calls with disturbing or distracting content. These Zoom bombers might share some form of nudity, use threatening language or share other graphic imagery to ruin meetings. To add to the concern, cybersecurity researchers found that the majority of Zoom bombing incidents are targeted towards high school and college classes.
Given the surge in Zoom users as a result of the pandemic, Zoom bombing incidents have become increasingly common—so much so that the FBI put out a public warning last year after two different online classrooms experienced a Zoom bomber intrusion, flooding the classes with profanity. While a Zoom bombing attack could happen to anyone, there are several steps you can take to make your meetings more secure and reduce the chances of an attack. Read on to learn how, or jump to the infographic below.
What Is Zoom Bombing?
Zoom bombing refers to the unwanted intrusion of strangers or internet trolls into a Zoom or video conference call. A Zoom bomber’s goal is to wreak havoc in a variety of ways, most often by inserting obscene images or other distracting content into the meeting. Once they gain access to a meeting, these uninvited guests typically share their screens in order to hijack control of the meeting and bombard participants with distracting or illicit content.
How to Prevent Zoom Bombing: 7 Tips
While a Zoom bombing can happen to anyone, there are steps you can take to reduce the chances of an attack. Zoom recently rolled out new security options that you can configure during an active call, and you can also secure your meeting in advance by disabling and enabling the right settings beforehand.
Use a Unique ID for Calls
Every Zoom user has a Personal Meeting ID (PMI) that functions similarly to a phone number. It’s a numeric code that you can share with people whenever you want to meet with them and remains constant. When creating a new meeting, you have the option to use your personal ID or generate a random one that’s unique from your PMI.
Your PMI is useful for recurring meetings with a small group since you can use it over and over without expiring. However, anyone who has your PMI can enter into your meetings at any time. If your PMI is found online, it’s vulnerable to being exploited by Zoom bombers who can now access your calls. On the other hand, the unique ID generates a new code every time you schedule a new meeting, making it far more secure.
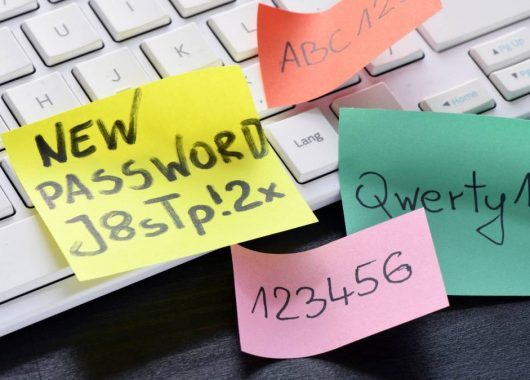
Always Set a Meeting Password
Setting up your Zoom meetings with a password is one of the easiest ways to keep meetings secure and keep unwanted guests out. When scheduling a new meeting, simply select the option to add a password. Zoom will generate one automatically and share it with only those who were invited to the meeting, or your attendees can submit the password when entering the room if prompted. That means that even if you share your meeting ID publicly, it will still be password-protected.
Use the Waiting Room Feature
A Zoom call can start in one of two ways: the moment the first user logs onto the meeting, or once the host authorizes it to begin. With the waiting room feature enabled, every user that logs on to a call is added to a queue and must be manually approved by the host. Enabling the waiting room feature is a smart security measure because it allows the host to vet anyone attempting to enter the meeting, providing more control over who can and can’t join.
Set Screen Sharing Controls
Zoom bombers are notorious for hijacking the screen after they’ve made their way into a Zoom call. You can prevent this by adjusting your screen sharing settings, either before or during the call.
To set screen sharing controls before the meeting:
- Go to the Zoom web portal (not the desktop app) and navigate to Personal > Settings > In Meeting (Basic) and look for “Screen sharing.”
- Select the option “Only Host.”
To set screen sharing controls during the meeting:
- Navigate to the host controls (these will be viewable from your screen if you’re the host) and click the arrow next to Screen Share.
- Select “Advanced Sharing Options.”
- Under “Who can share?” select the option “Only Host.”
Lock Your Meeting
Hosts have the ability to lock their Zoom meetings once all members have joined. Locking the meeting prevents anyone else from entering—even users who have the correct meeting ID and password. Here’s how to do it:
- Once the meeting is running, navigate to the host controls and select “Participants.”
- In the pop-up menu that appears, select More > Lock Meeting.
Disable Users’ Audio and Video
One surefire way to prevent obscene content from being displayed in your meeting is to disable the attendees’ video. You can do this when you’re scheduling a new meeting in the same tab that you configured your unique meeting ID and password. When scheduling a new meeting, simply navigate to the Schedule Meeting section and select “off” for participants.
To further protect your meeting from disruptive intruders, you can mute the audio for all attendees as well. This must be done by the host once the meeting has started. Here’s how:
- Navigate to the host controls and select “Participants”
- In the menu that appears to the right of your screen, find and select the “More” button.
- In the menu that appears, check the option “Mute Participants On Entry.”
- Make sure the option “Allow Participants to Unmute Themselves” is unchecked.
Remove Users from Meetings
If an unwanted guest ends up in your meeting, the host has the power to remove them or put them on hold. All you need to do is select “Participants” from the host controls at the bottom of the Zoom screen, then hover over the name of the person you want to remove and select “Remove.”
What to Do If You Experience Zoom Bombing
If your meeting has been crashed by a Zoom bomber, there are a few steps you can take in addition to removing them from the meeting.
- Report the intruder to Zoom: If you encounter a Zoom bomber, submit a report to Zoom while the meeting is still in progress, if possible. If you’re able to submit the report while the meeting is still happening, the host can select the specific participants they want to report and submit it to the Zoom Trust and Safety team for further evaluation.
- Remove the intruder from your meeting: While the meeting is in progress, select “Participants” from the host controls, then hover over the name of the person you want to remove and select “Remove.”
- Review the Zoom settings above and ensure yours are set to the proper security settings.
Zoom has become an invaluable tool for keeping classrooms and businesses running in the midst of the pandemic. That said, anything that’s connected to the internet is susceptible to cybercriminals or pesky individuals seeking to exploit security weaknesses. By following the security measures above, you can protect against a Zoom bombing attack and keep intruders at bay. To further secure your network, equipping yourself with a cross-platform antivirus that secures all your devices is an excellent way to protect yourself and your data.